Cooking chicken breast in the Dutch oven couldn't be easier! This recipe for Dutch oven chicken breast with potatoes and vegetables is a complete, and very comforting, meal that's ready in only about 45 minutes.

Did you know you can cook chicken breast in the Dutch oven? Yes you can, and it's super simple to do! I'm sure after trying it, this chicken breast recipe for the Dutch oven will soon be in your weekly dinner rotation. It's a very comforting recipe that tastes like a Sunday dinner, but with a Wednesday evening time commitment! You only need about 45 minutes and 10 basic ingredients!
Chicken breasts are first browned in butter, then finished off in the oven with baby potatoes, carrots and onions, all smothered in a flavorful (but not too heavy) gravy. All the cooking for the chicken breast, potatoes and vegetables is done in the Dutch oven, saving you lots of pots and pans to wash!
And, by finishing the chicken breasts in the oven rather than the stove top, you are also saving yourself a lot of hassle and attention - no need to adjust the burner temperature or stir the pot to avoid scorching the bottom. Instead, you can use that window of time to wash your (very few!) dishes from prep or put together a nice salad to go alongside.
Before we go any further, are you wondering - what is a Dutch oven, and why should I use one? Read on for more!
This post contains affiliate links. As an Amazon Associate I earn from qualifying purchases. If you make a purchase through the link, it won’t cost you more but I may earn a small commission. I only recommend products that I personally use and love!
Jump to:
What is a Dutch oven?
A Dutch oven is a thick-walled cooking pot that comes with a tight-fitting lid. They are usually made of cast iron, cast aluminum or ceramic. The metal can either be coated in enamel, or seasoned (just like a cast iron skillet).
What are the benefits of cooking in a Dutch oven?
There are many benefits to cooking with a Dutch oven. For me, one of the biggest benefits is the ability to use it both on the stovetop and in the oven. This mean you can both brown food and simmer sauces on the stovetop, then move the whole thing directly into the oven to finish cooking.
And this is exactly what we will be doing with this Dutch oven chicken breast recipe! (It's nice to finish the food in the oven because it's more hands-off; no need to stir or adjust the stove temperature, as I mentioned above.)
Another benefit is that the Dutch oven looks nice enough to serve the food from right at the table. So, you can start on the stovetop, move to the oven, and finish at the table. This means less dishes to clean up at the end of the night - always a good thing!
Overall, owning a Dutch oven is great because it's a super versatile piece of kitchen equipment that should last you a really long time. You can make soups, stews, braised meat dishes, and even bread in the Dutch oven. Here's a great article discussing even more Dutch oven benefits and uses!
Recipe ingredients

Ingredient notes
- Chicken breast: for this recipe, you will need boneless skinless chicken breast.
- Baby potatoes: I love using baby (aka "new") potatoes; they are so small so you don't need to cut or peel them, saving time on prep. But, if you don't have baby potatoes, you can just cut up regular potatoes!
- Onion: I used yellow onion, which is a good all-around onion for cooking. But, if you don't have yellow onion, you can use whatever type you have.
- Chicken broth or stock: you can use either store-bought or homemade. And, if you don't have chicken broth, you can substitute any type of broth you do have, like beef or vegetable.
Step by step photos
1. Before you do anything else, preheat the oven to 400 degrees F (200 degrees C).
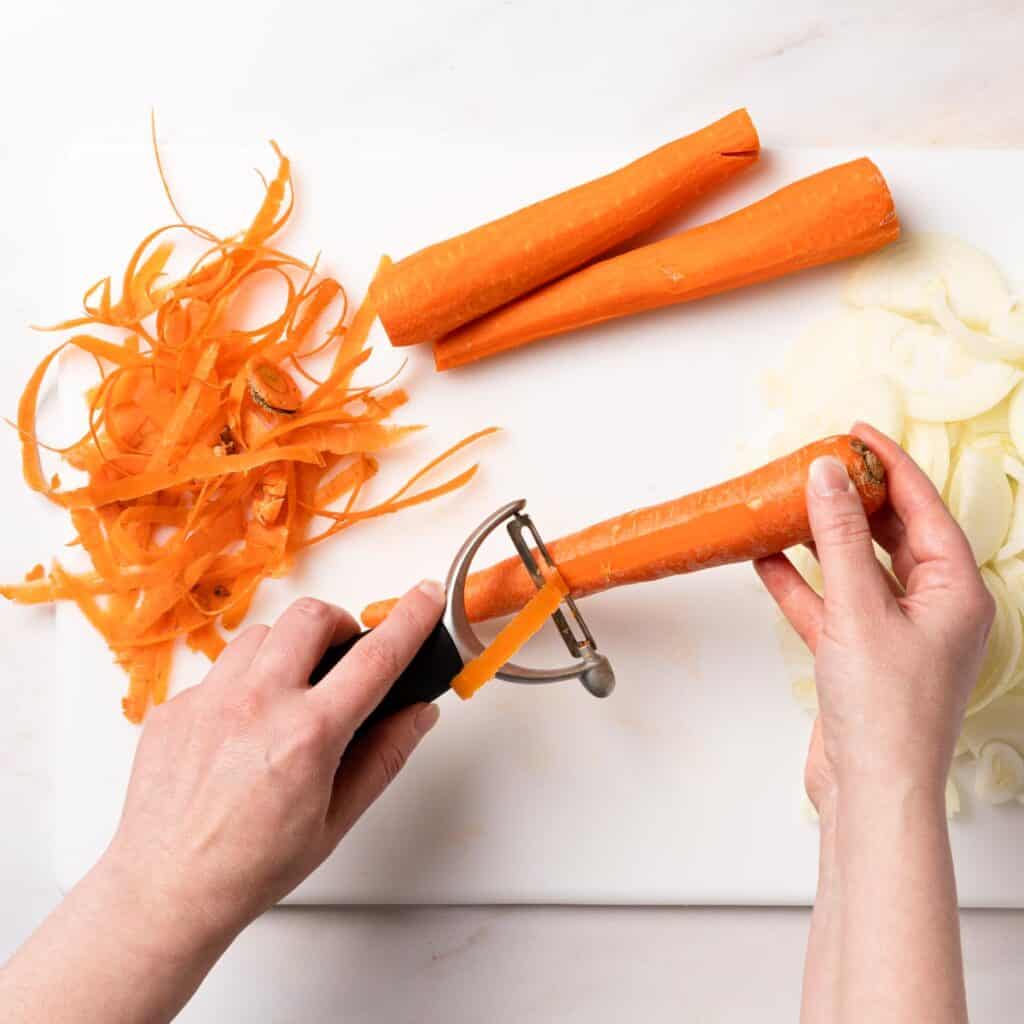
Then, you can start by prepping the veggies. First, peel and slice the onion.

2. Next, peel the carrots and cut them into about ½ inch (~1.3 cm) slices. If needed, scrub the baby potatoes. (The ones I bought were pre-washed, hooray!). Set the veggies aside for now.

3. Now you can turn to the chicken breasts. All you need to do is season them on both sides with salt.

4. Next, place the Dutch oven on the stovetop set to medium heat. Add 1 tablespoon of the butter and let it melt. When the butter is hot, add the seasoned chicken breasts.
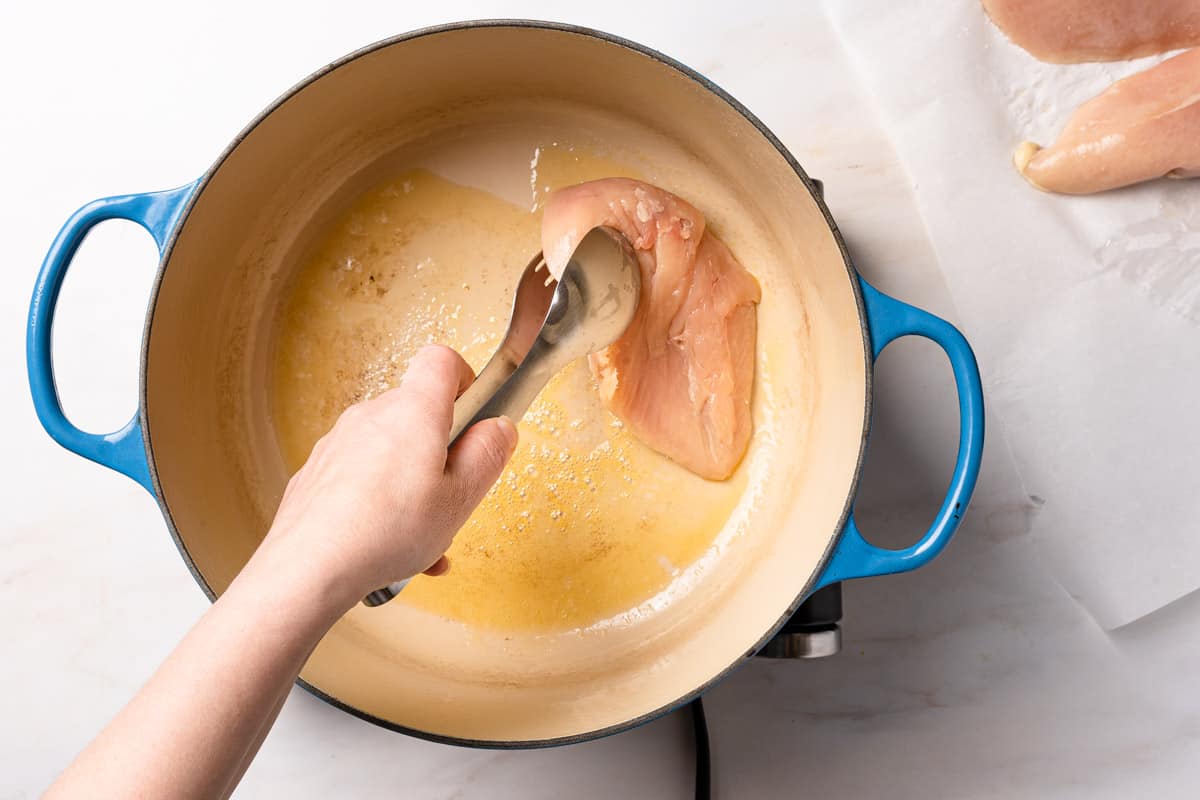
5. Let the chicken cook without touching it for about 3 minutes. Check underneath the chicken with tongs. If you see a nice brown color, flip the chicken pieces.
Otherwise, you can let them cook for another minute or so, until they are browned to your liking, before flipping.

6.When the chicken breasts are browned on both sides, remove them from the Dutch oven, and set them aside. They won't be fully cooked, but that's ok.

7. Now add the remaining 2 tablespoons of butter to the Dutch oven and allow it to melt. Then add in the onion, kosher salt, dried thyme, and garlic powder.
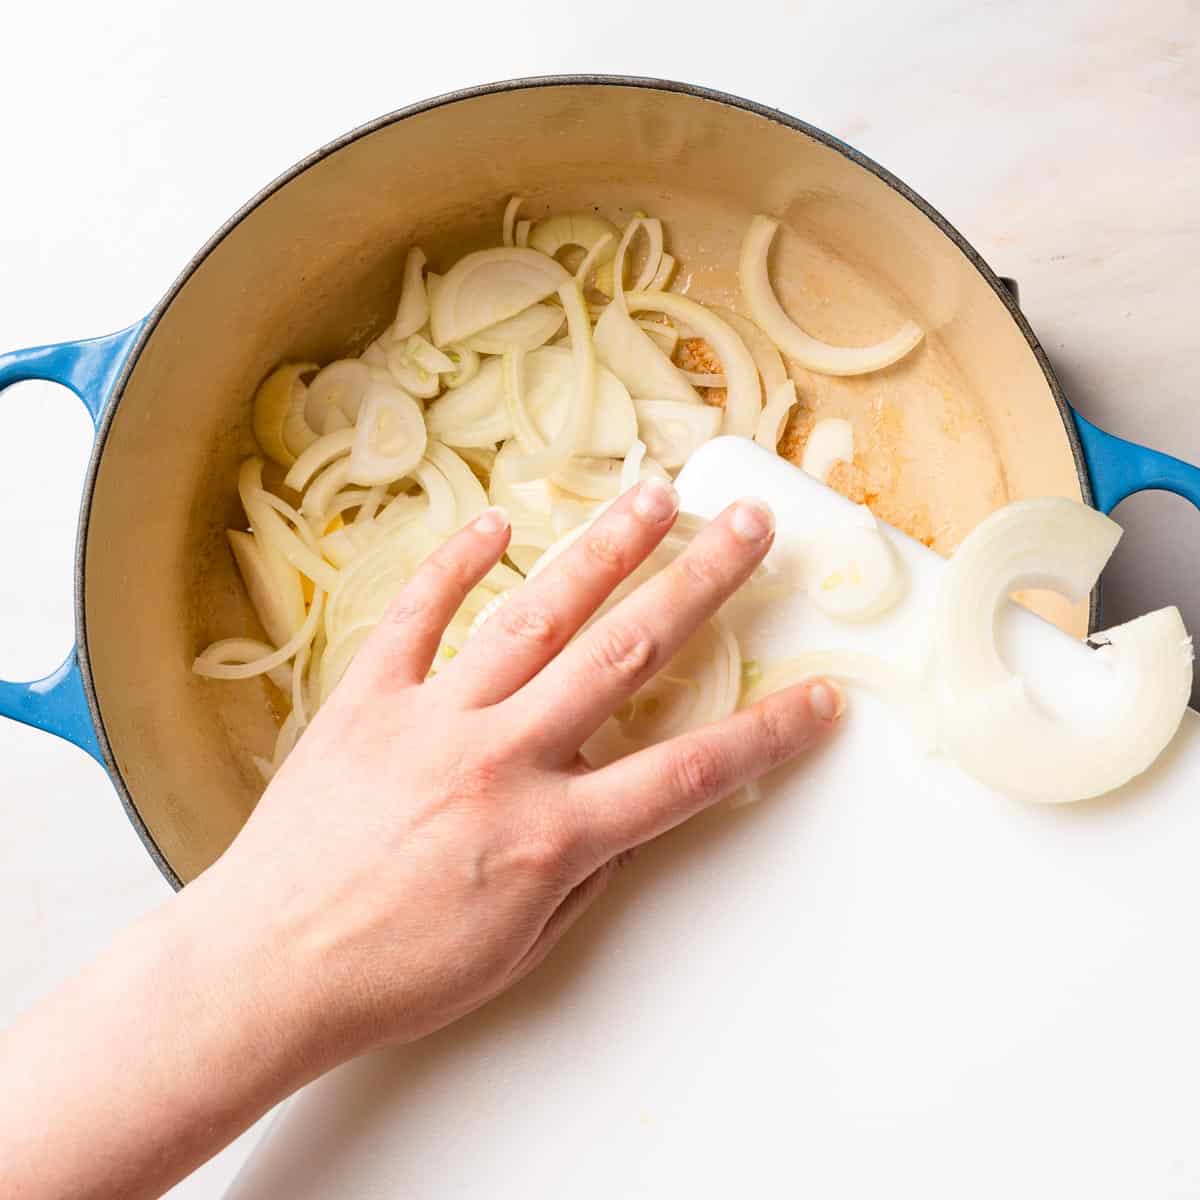
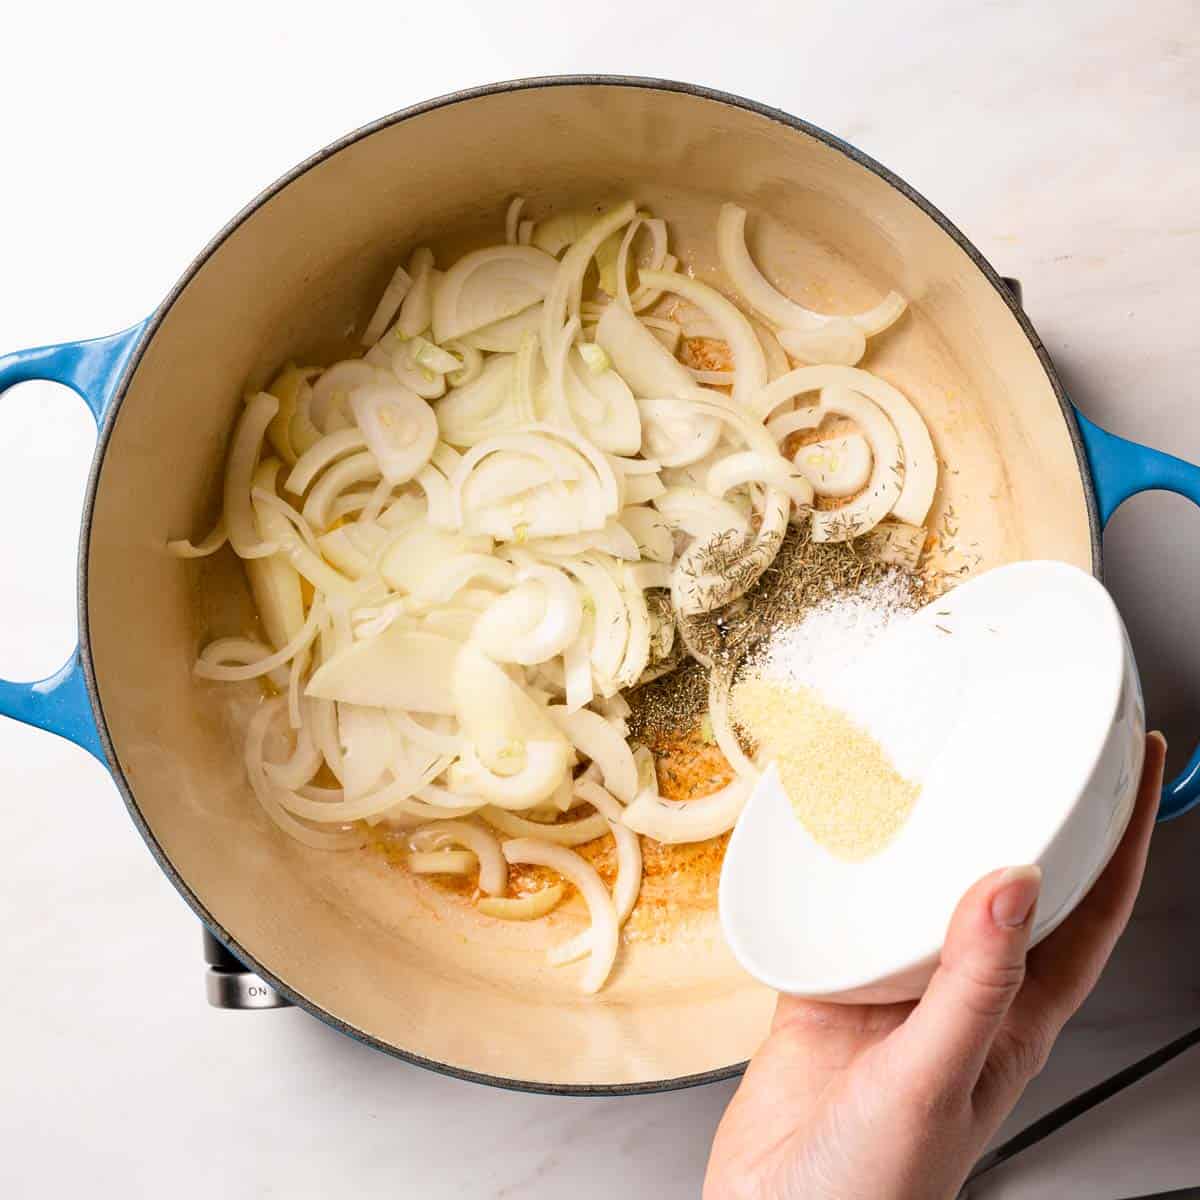
8. Let the onion cook for about 3 - 4 minutes, stirring frequently. The onion should be softened, and just starting to pick up some color at this point.

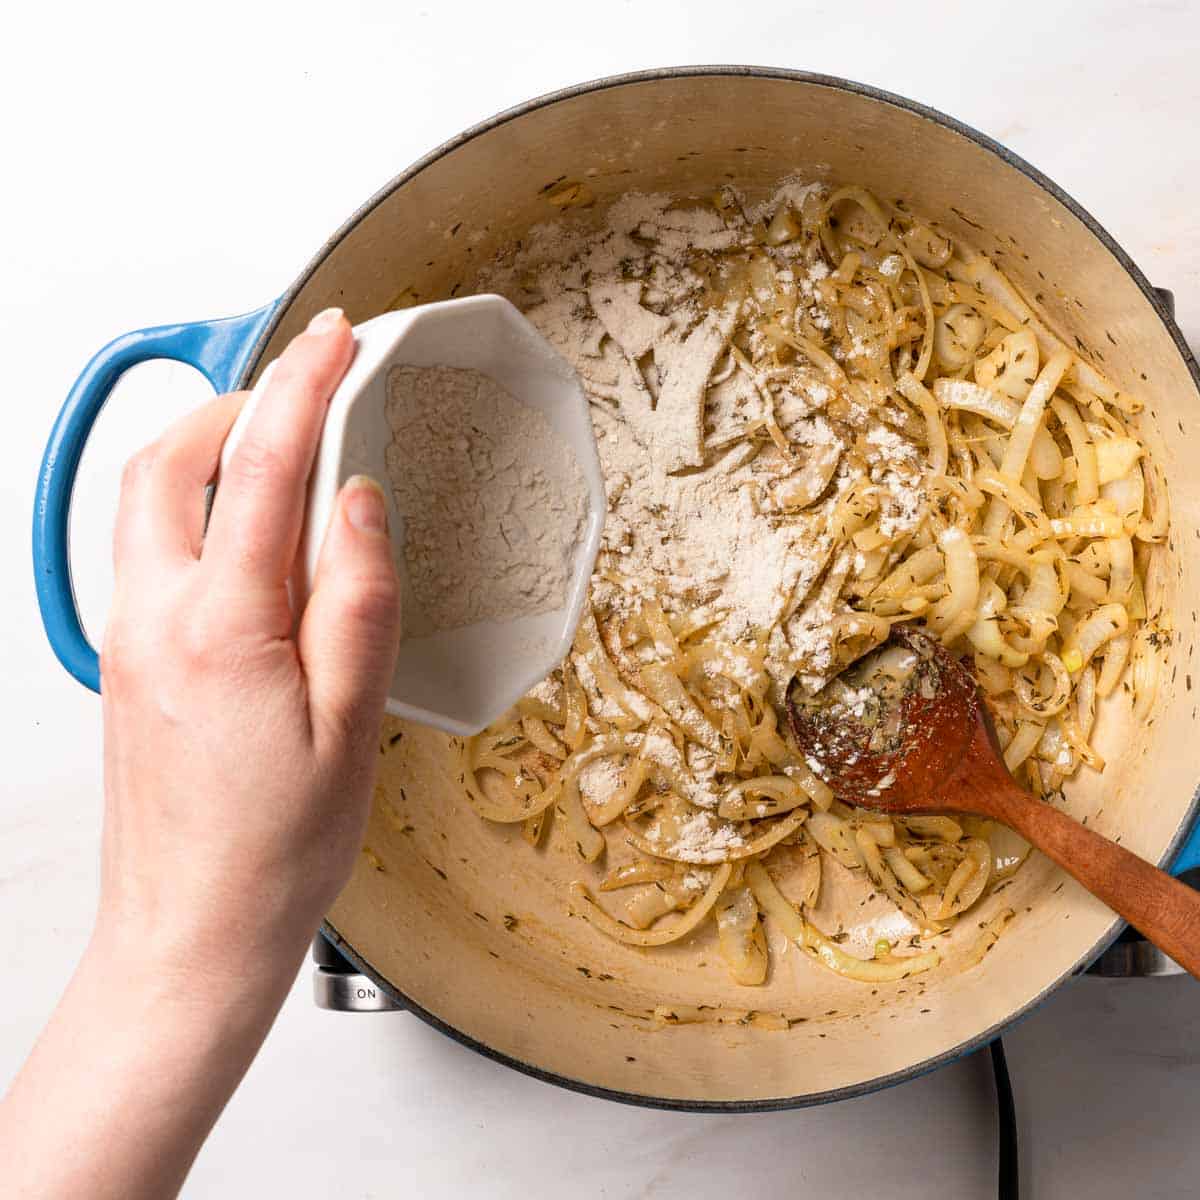
9. Now you can sprinkle in the flour. You don't have to be delicate about it, just pour it in and stir it around so it coats the onions evenly. Cook the onion and flour for another minute.

10. At this point you can pour in the broth. Stir everything together - and make sure to use your wooden spoon to scrape up all those brown bits stuck to the bottom of the Dutch oven!


11. Now you can add in the baby potatoes and carrots from earlier.

12. Turn the heat up to bring the mixture to a boil, then turn it down to maintain a simmer. Stir occasionally, and let everything simmer together for about 5 minutes.

13. Now you can nestle the browned chicken breasts back into the Dutch oven; make sure they are at least partially submerged in the gravy!
Add the lid on top and place it in the preheated oven to finish cooking.

14. When the chicken reaches an internal temperature of 165 degrees F and the potatoes and carrots are tender, the dish is done! You can check the chicken temperature with an instant read thermometer. To test the doneness of the carrots and potatoes, pierce them with a fork.

Once the chicken is cooked, it's a good idea to let it rest for about 5 minutes. I like to remove the chicken from the Dutch oven for the resting period, so it doesn't continue to cook in the hot liquid.
Substitutions and add-ins
I kept the ingredients and seasonings in this Dutch oven chicken breast recipe pretty simple, to cut down on prep time and to make the recipe as accessible as possible. So, that means there are a ton of opportunities to customize this recipe to suit your own tastes!
Here are some substitution and/or add-in ideas:
- As I mentioned above, if you don't have baby potatoes, you can use any other type of potato. Just cut them into about 1 inch (2.5 cm) pieces. If the skin of the potato is thin, you don't even have to peel them!
- If you don't want to use butter, substitute an equal amount of pure olive oil or avocado oil.
- Try switching out the carrots and/or potatoes for other root vegetables you like, such as: sweet potatoes, parsnips, rutabaga, celeriac, or turnips!
- You can also add in even more hearty vegetables to go along with the carrots, potatoes and onions. Try adding mushrooms (I know, not technically a vegetable!), cauliflower florets, or sliced celery.
- Feel free to substitute or add in other herbs and spices that you enjoy. Instead of dried thyme, I've substituted an equal amount of dried rosemary, which was also delicious. You can also try dried sage, oregano, tarragon, or marjoram.
How long to cook the chicken breasts in the Dutch oven
- After browning, the chicken breasts should take roughly about 15 - 18 minutes in the oven to reach the target temperature of 165 degrees F. But, the exact amount of time needed will vary based on how large the chicken breasts are, and on your own unique oven.
- The most accurate way to ensure the chicken breasts are cooked to the target temperature is to use an instant read thermometer. Make sure you probe the chicken at the thickest part. If you don't have one, you can cut open the thickest chicken breast and make sure it is white all the way through.
- This would also be a great time to use an oven-safe alarm thermometer, shown below. This is a special type of thermometer probe that you can insert into the chicken before placing it in the oven. You can place the lid right on top of the wire. The display is kept outside the oven, which will beep when the food reaches your target temperature.

- This is the same thermometer I used for my baked BBQ chicken thighs recipe. This is a great tool to use because you don't have to keep checking on the chicken, and really helps eliminate the risk of overcooking the chicken!
Storage and reheating tips
- Store any leftovers in the fridge in a covered food storage container. You can keep leftovers in the fridge for 3 - 4 days.
- If you want to keep leftovers for a longer time period, store them in the freezer (again in an airtight container) for 3 - 4 months. The potatoes will be a little soft after coming out of the freezer, but they will still taste good!
- Wondering what's the best way to reheat leftover Dutch oven chicken and potatoes? My favorite way is to place them into a pan with a lid and warm them gently on the stove, stirring occasionally, until heated through. If you need a little more moisture, add a splash of broth or water. You can even use the same Dutch oven as before to reheat the leftovers!
- For best results in reheating leftovers from the freezer, first let them thaw in the fridge overnight.
- If you want to use the microwave to reheat a single serving, cut the chicken into slices or bite-sized pieces first. This will help the chicken heat more quickly and evenly than if you try to microwave an entire chicken breast!
Other tips and tricks
- Here I used Diamond Crystal kosher salt, which is lighter and flakier than Morton kosher and regular table salt. If you want to use table salt or Morton kosher salt, use ½ teaspoon in the gravy rather than the full 1 teaspoon called for. When seasoning the chicken, just salt to taste.
- Are your chicken breasts finished cooking but the potatoes and carrots aren't done? This could happen if the chicken breasts are on the smaller side. Just remove the chicken breasts from the Dutch oven, then place the lid back on. Bake for an additional 5 - 10 minutes, or until the veggies are cooked through.
- The gravy will continue to thicken as it cools; if you still want it a little thicker, you can remove the veggies and chicken from the Dutch oven and simmer the gravy a little longer on the stovetop!
Recipe FAQs
You will need a Dutch oven with a capacity of around 7 - 8 quarts (6.6 - 7.5 liters). Just make sure you have enough room to brown all the chicken pieces without too much crowding. If your Dutch oven is a little larger than that, it will work fine too. The Dutch oven I used here is the 7.25 quart capacity Dutch oven from Le Creuset (affiliate link).
If you don't have a Dutch oven, you can still make this recipe with a little modification. For the portion of the recipe that is done on the stovetop, you can use a large pot instead.
Then, transfer all the ingredients into a casserole dish that has a tight fitting lid and finish baking in the oven. Alternatively, you can use a 9 x 13 inch baking pan that you cover tightly with aluminum foil.
This recipe already has protein, starch, and vegetables, making it very well-rounded as-is! You don't need to add much to make it a complete and satisfying meal.
Try pairing the chicken with a green salad, bean salad, or kale salad, sautéed mixed vegetables, or steamed broccoli. Bonus points for drizzling the gravy overtop the side of veggies also!
These Dutch oven chicken breasts and potatoes would also go well with my recipes for brussels sprouts salad with cranberries and creamy tomato cucumber salad!
The biggest way to ensure the chicken breasts stay moist is to not overcook them! The USDA advises that chicken breasts must be cooked to a temperature of 165 degrees F. So, that's what we are going with here; much beyond that, and you risk drying the chicken breasts out.
For that reason, I recommend picking up an oven safe alarm thermometer as I recommended above - they're great because they will let you know exactly when the target temperature is reached. You don't have to keep checking the food constantly, or, even worse, risk the chicken breasts going way above the target temperature.
Even if you do end up overcooking the chicken, just smother each bite in the delicious gravy that the chicken and vegetables are cooked in - this will really help to re-moisten the chicken and it will still be absolutely delicious!
In my opinion, these Dutch oven chicken breasts taste the best when eaten fresh, but leftovers do keep very well and taste delicious reheated. See the above Storage and reheating tips section for more info on managing any leftovers!

Related recipes
If you’ve tried this recipe, please leave a star rating and/or review in the comments section below, I would love to hear from you! You can also follow me on Facebook, Instagram and Pinterest. And sign up for my weekly newsletter to get recipes delivered straight to you!
Print📖 Recipe
Dutch Oven Chicken Breast
This is an easy and comforting meal you can make with basic ingredients and in only 45 minutes! A Dutch oven is the only cooking pot used - for browning, simmering, and baking in the oven - saving you lots of dishes to wash up!
- Prep Time: 10 minutes
- Cook Time: 35 minutes
- Total Time: 45 minutes
- Yield: 4 servings 1x
- Category: main course, entree
- Method: stove top, bake
- Cuisine: American
Ingredients
- 24 ounces (680 g) boneless skinless chicken breast (about 3 - 4 medium chicken breasts)
- 12 ounces (340 g) onion (about 2 medium or 1 large onion)
- 12 ounces (340 g) carrots (about 3 medium carrots)
- 12 ounces (340 g) baby potatoes (1 inch diameter - see note 1)
- 3 tablespoons (43 g) butter, divided
- 3 tablespoons (24 g) all-purpose flour
- 1 teaspoon kosher salt, plus more to season chicken (see note 2)
- 1 ½ teaspoons dried thyme
- 1 teaspoon garlic powder
- 2 cups (473 ml) chicken broth/stock
Instructions
- Preheat the oven to 400 degrees F (200 degrees C).
- Slice the onion. Peel the carrots and cut into approximately ½ inch (1.3 cm) rounds. Scrub the potatoes (if not purchased pre-washed). Set vegetables aside.
- If needed, trim any excess fat from the chicken breasts. Season both sides of the chicken with salt to taste.
- In a large Dutch oven (7 - 8 quart capacity), heat 1 tablespoon of butter over medium heat. Swirl the melting butter to evenly coat the surface of the Dutch oven. When the butter is melted, place in the seasoned chicken breasts. Let the chicken breasts cook, undisturbed, for 3 - 4 minutes, or until browned. Flip the chicken and cook for an additional 3 - 4 minutes to brown the other side. (If the butter is getting too dark while the chicken is browning, turn the heat down.)
- Remove the browned chicken breasts to a plate and set aside. Add the remaining 2 tablespoons butter to the Dutch oven. When the butter is melted, add the sliced onions, 1 teaspoon kosher salt, dried thyme, and garlic powder. Cook for 3 - 4 minutes, stirring occasionally, until the onion is softened.
- Sprinkle in the flour and cook for 1 minute, stirring frequently.
- Pour in the chicken broth/stock. Stir to combine, scraping up any browned bits from the bottom of the pan. Add the carrots and potatoes to the Dutch oven. Turn the heat up to high to bring the liquid to a boil, then turn the heat down again to maintain a simmer. Simmer for 4 - 5 minutes, stirring occasionally.
- Turn the heat off the burner and add the browned chicken breasts back into the Dutch oven, nestling them down into the gravy (they do not have to be fully submerged). Place the lid on the Dutch oven and bake in the preheated oven for 15 - 18 minutes, or until the chicken has reached an internal temperature of 165 degrees F and the carrots and potatoes are fork-tender.
- Remove the chicken from the Dutch oven and allow it to rest for about 5 minutes. (Allowing the chicken to rest submerged in the hot liquid may cause the chicken to overcook.) The gravy will continue to thicken as it cools. When serving, the chicken can be placed back in the Dutch oven with the vegetables.
Notes
If you don't have baby potatoes that are roughly 1 inch (2.5 cm) in diameter, you can use any type of potato cut into 1 inch (2.5 cm) chunks.
This recipe was developed using Diamond Crystal kosher salt; to substitute table salt or Morton kosher salt, use ½ teaspoon in the gravy rather than the 1 teaspoon called for. When seasoning the chicken, salt to taste.
If the chicken breasts are finished cooking but the potatoes and carrots aren't tender enough, just remove the chicken breasts from the Dutch oven, place the lid back on and bake for an additional 5 - 10 minutes, or until the veggies are cooked through.
The nutrition information below was calculated using a total of 1 ½ teaspoons Diamond Crystal kosher salt for the entire recipe. This nutrition information is an estimate only; the nutrition counts of your dish will vary based on the brands and exact amounts of ingredients used. This information was provided by an online nutrition calculator, and should not be considered a substitute for professional medical, health, or nutritional advice. See our full nutrition disclosure policy.
Nutrition
- Serving Size: ¼ recipe
- Calories: 343
- Sugar: 5.1 g
- Sodium: 917 mg
- Fat: 11.9 g
- Saturated Fat: 6.4 g
- Carbohydrates: 25.2 g
- Fiber: 4.6 g
- Protein: 34.4 g
- Cholesterol: 97 mg











Marta says
I am still in shock that such an easy, simple recipe can pack so much amazing flavor in it! This dutch oven chicken breast is going to become a regular meal on my monthly meal plans.
Kate says
I'm so happy you like the recipe Marta, thank you for sharing!
Ed says
Came out great !
Kate says
I'm really glad you enjoyed the recipe Ed! Thank you for your comment 🙂
Gloria says
Rustic, simple, and delicious. That is what this recipe is all about. Perfect for any night of the week.
Kate says
Thank you Gloria I appreciate that 🙂
Sean says
I love any recipe I can use my Dutch oven for and this was delightful.
Kate says
Thank you so much Sean!
Veronika says
Such a simple and easy recipe! Made these in our Dutch oven last night and the whole family thoroughly enjoyed the meal, thank you!
Kate says
I'm so glad you enjoyed the recipe Veronika, thank you for sharing!
Veronika says
This recipe is absolutely amazing! It was so easy to make and has lots of flavors! Going to make it again this weekend 😉
Jamie says
I love how I can make this entire meal in the Dutch oven and not have lots of pans to wash after. This was so flavorful and satisfying. Love it!
Kate says
Thank you Jamie! 🙂
Erin says
This was excellent! And I love how easy it was to put together. Thanks for including grams! That helps a lot. 🙂
Kate says
I'm glad you enjoyed it Erin, thank you 🙂
Riva Goldman says
Can this same recipe be used with a 5 quart Dutch Oven?
Kate says
Hi Riva! I tested this recipe with a slightly larger Dutch oven (about 7 quart), but I think it would work with a smaller one also. The only thing you may want to modify is to brown the chicken breasts in batches if you don't have enough surface area to cook them in one layer. If you end up making the recipe please let me know how it went for you!
LaKita says
This chicken is so flavorful and delicious! It is so simple and I love any reason to pull out my dutch oven and put it to good use.
Kate says
Thanks LaKita, I enjoy having a reason to use my Dutch oven too 🙂
Joann B says
I followed this exactly. It turned out great. Wouldn’t change a thing and will definitely make again. Thanks for sharing the recipe.
Kate says
Joann I'm so happy that you enjoyed the recipe! Thank you for sharing your feedback 🙂
Karen says
So easy, and super tasty...I didn't add a thing to this recipe, it's perfect as is!
Happy to have found Nibble and Dine, will be checking out the recipe box regularly 🙂
thanks Kate!
Kate says
Karen, thank you so much for trying my recipe and providing your feedback, I am so delighted that you enjoyed the Dutch oven chicken. And I am so happy you will be checking out some of my other recipes as well, your comment has absolutely made my day! 🙂
Jenny F says
This is so easy and good, I’ve made it twice now. I tried the chicken fully submerged the second time and it is so much more flavorful, also I added half a packet of roast seasoning by McCormick! Literal chefs kiss and my kids love it! Especially my hubby (second time this week I’ve made it lol) Thank you for sharing this recipe 🥰
Kate says
Oooo Jenny the roast seasoning sounds like it would really add that extra special "something"! Thanks for sharing I'm really happy that you and your family have been enjoying the recipe :):)
Tim says
This was so good and quick and easy. The gravy is excellent. Thanks for the recipe.
Kate says
Thank you Tim, I'm really happy that you enjoyed the recipe! 🙂
Kyle says
So tasty, I added a squeeze of lemon and celery salt as well. One star knocked off for cooking times - I thought it sounded weird to not soften the carrots with the onions, the end result even with keeping the dutch oven on the stove top longer than it says and kept it in the oven for 20 minutes was tough carrots and tough potatoes. Will be making this again just keeping it in the oven longer.
Kate says
Thank you Kyle for trying the recipe, I'm glad you enjoyed it overall! If you want to make the recipe again sometime you could try cutting the carrots and potatoes into smaller pieces so hopefully everything will be finished on time. Thanks again for providing your feedback I appreciate it!
John says
Added a cup of white wine and reduced chicken stock by a half cup .
Wonderful flavor .
Kate says
That sounds delicious John! If I have some white wine left over next time I make this, I will definitely give that a try 🙂 Thank you for sharing!
Emmy B says
This recipe was absolutely delicious! My husband and I just came back from a week-long vacation and we had basically nothing left in the house for dinner when we got home except for some chicken I pulled out of the freezer and some potatoes/onions/carrots. The sauce/gravy in this is absolutely delicious - I did add some additional spices to punch it up a bit, but I think it would have been spot-on anyway even without my modifications. Tastes like you spent hours on it but it's much faster. Thanks so much for this!
Kate says
Aw Emmy thank you so much for your lovely comment. I am really happy that you and your husband enjoyed the recipe, especially after vacation when maybe you're really looking to enjoy home cooking again but are low on energy! And I totally know the feeling when you don't have much in the way of groceries at the house and need to come up with something. So I'm really glad this recipe was helpful for that situation!
Becky says
I have made this with the boneless skinless chicken breasts and also using thighs - skin in bone in. I added cooking time for thighs, it seems to work well. Great recipe, thanks.
Kate says
Becky I'm glad to know that the recipe will work with bone in chicken as well! Thanks for sharing your feedback I appreciate it 🙂
Ann says
This was sooo good. Even my extremely picky husband loved it. Thank you!
Kate says
Ann that is wonderful, I'm so glad that you and your husband enjoyed it! I know the feeling when you make something even a picky eater enjoys, like you cracked a secret code or something 🙂 Thank you for trying my recipe and giving your feedback!
Mag Horsey says
Do I have to put in house oven?
Kate says
Hi Mag, thank you for your question! This recipe does call for starting on the stovetop, but then finishing the dish in the oven. But, you could experiment with finishing it on the stove top, simmering it on low heat. I'm sorry can't give more details on timing and so forth, because I didn't test the recipe that way. But if you try it, please let me know how it turns out!
Jan says
I do not exactly have a Dutch oven, but a ceramic pot with a glass lid.
It came out great! Thank you for the recipe, and the perfect guide. 😊
Kate says
Hi Jan, thank you so much for taking the time to comment, I am really happy you enjoyed it and that it worked well with the pot that you had! 🙂
Chris says
Delicious. I will be making this again. Perfect instructions
Kate says
Thank you so much Chris! I'm really happy that you enjoyed the chicken and found the instructions to be just what you needed - for a recipe writer that is high praise and it really made my day! 🙂
M says
This recipe was nice and simple and everything turned out gorgeous. Cut my carrots a little smaller and halved the potatoes to ensure they’d be cooked when everything else was. Came out perfect. My only note is there was WAY too much thyme for us. I will definitely do this again but reduce that measurement way down. If you love thyme forward dishes have at it! Really appreciate the recipe and can see it on regular rotation here.
Kate says
Thank you M for trying my recipe and giving your feedback, I really appreciate it! I'm sorry the thyme was too much for your tastes, but I'm glad that is something you can easily adjust and that you are thinking about making it again in the future (to me that is the best compliment!). Thanks again 🙂
Maria says
I usually don't make these meals because I mess up the gravy bit, but it turned out great! and delicious to boot! We made it with breasts and thighs (bone-in) and added time for the potatoes and carrots to cook through, we will be cutting veggies up next time. This will be a go-to recipe for sure, it was so easy to make!
Kate says
Thank you Maria for your feedback, I'm really glad that you liked the recipe, and that it worked well using bone-in thighs!
Shannon says
solid recipe, i made some tweaks with seasoning- used complete season for chicken instead of dry herbs did sprigs of thyme and rosemary and 4 smashed garlic cloves, i also added about 1/4 cup lemon juice at the end for some acidity and loved it. i had to cook browned chicken in oven for almost 27 min and continued cooking veggies for another 20- i do feel my oven is off so thats prob why. thank you for recipe!
Kate says
Thank you Shannon for your feedback on the recipe, I'm sorry that the cook times were a little off for you but I'm glad you were able to make it work. And adding lemon juice sounds like a really delicious addition!
Susan says
I made this tonight and there were no leftovers! So simple and delicious. Will definitely make again.
Kate says
Thank you Susan I'm really glad that you enjoyed the chicken, thanks for sharing!
Jen says
This turned out to be restaurant-quality. I also added a bay leaf and sprinkled a little paprika in it. It was fantastic
Kate says
Jen your additions sound really delicious, I am really happy that you enjoyed the recipe!!
Shawn says
Such a fabulous recipe! I did adapt it from dutch oven ( don't have one) to slow cooker by sauteing the vegetables for about 12 minutes, reducing the liquid 1/2 and cutting cooking time down to 2 hours on LOW so as to not overcook the chicken breasts. I added rosemary because I love how it goes so well with chicken, carrots and potatoes.
Kate says
Hi Shawn, thank you so much for your comment! I love that you were able to adapt the recipe to your own needs. And I totally agree, rosemary is a great flavor pairing with the other ingredients in this recipe. Thanks again for sharing 🙂
mertron says
I used this recipe to christen my brand-new Dutch Oven - my first one! Everything turned out perfectly. The gravy is so good!!! Restaurant-quality meal. Thanks for the recipe!
Kate says
Mertron I'm so glad that you enjoyed the recipe, thank you for your comment!
Ali says
Bland. Greenish hue from the thyme. I'm a seasoned cook and wanted to try something different. Followed recipe to a T...but lacking flavor, color was not good. Chicken moist. Gravy reacted like it should. Waste of good ingredients and time. Needs pepper and either more garlic or who knows. Will not be adding this to my meal rotation.
Kate says
Ali I'm so sorry that you were disappointed in the recipe! I appreciate your feedback and will take your comments into consideration for the next time I update the recipe.
Robin says
This was supper tonight and it was a hit!! Thanks for the simple & easy directions. I did have to bake it a little longer because my chicken breast were pretty thick. Will definitely fix again!
Kate says
That's great Robin I'm really happy that you enjoyed the recipe 🙂
Caitlin says
This recipe is delicious! I have a house full of picky eaters and they couldn't get enough. Ate every single little bit until the dutch oven was clean. This is now a favorite in this household! Thank you so much for the great recipe!
Kate says
Aw Caitlin your comment made my day, I am so happy to hear that your family full of picky eaters enjoyed the recipe so much! I have a picky eater in my house too so I know how it can sometimes be discouraging to work hard on cooking dinner and it goes uneaten. So I'm glad you had a good experience with this recipe 🙂
Meaghan says
Outstanding chicken and veggie meal. This is in the rotation! I didn’t change a thing.
Kate says
That's wonderful Meaghan, I am really happy to hear that you enjoyed the recipe and that it worked well for you as-is 🙂
Rachel says
This was so good! I had some zucchini to use up so I cut half of a large zucchini into approximately 1 inch chucks and added them at the end of the baking time, put lid back on and put it back in for a few more minutes. It was so good and added a little green to it. It would be great with fresh green beans in it too.
Kate says
Hi Rachel, I'm so glad that you enjoyed the chicken recipe. Adding the zucchini at the end sounds like a really great addition, thank you for sharing 🙂
Russ says
Thanks for this recipe. I have now made this a few times and have started playing around with it. I added some vermouth before the stock for a minute and a little cream after the broth and was divine. Also white wine has worked well. Added a shallot with the onion and also mushrooms as well before adding the chicken back.
Kate says
Russ thank you for your comment, your tweaks sound like they would really elevate this dish! I really need to try the vermouth and cream version, sounds divine 🙂
Sue says
What adjustment do you suggest for bone-in chicken breasts? Thank you.
Kate says
Hi Sue, thank you for your question! If you use bone-in chicken breasts, the cook time will be much longer. I haven't tested the recipe with bone-in breasts myself, but through some research it looks like to cook the bone in chicken breasts could take around 45 minutes to cook, compared with about 18 minutes for the chicken breasts. Again, I haven't tested this myself so I can't make any guarantees, but if I were to try and modify this recipe to use bone in chicken breasts, I would prepare the recipe as written, except cut the carrots into a bit larger pieces and use larger baby potatoes (to account for the longer cook time in the oven). Then, extend the oven cook time until the chicken reaches an internal temperature of 165 degrees F, about 45 minutes (using a thermometer is a good idea). I hope this helps, if you experiment with using bone in chicken breasts with this recipe I would love to hear how it turned out!