


Baked BBQ chicken thighs are the perfect weeknight main course when you want something easy but a little bit extra-special. By seasoning the thighs with a smoky spice blend (even under the skin!) these BBQ thighs come out full of flavor every time. You only need about 10 minutes of prep time, with a total time of 50 minutes or less.

If you don't have the time (or weather!) for grilling out but are still craving barbecue, you can get the next-best thing with this easy recipe for baked BBQ chicken thighs. Every time I make these baked chicken thighs, I am blown away by how flavorful they are! The key is seasoning the thighs well with a spice blend, including underneath the skin! This way, the chicken meat itself is being seasoned, leading to an extra punch of flavor in every bite!
Also, did I mention that you only need about 10 minutes prep time? The oven takes care of the rest, so while the chicken is baking, you can whip up a couple sides (how about Jalapeño Popper Potato Salad or Honey Orange Glazed Carrots?) and you will have quite the lovely feast!
This post contains affiliate links. As an Amazon Associate I earn from qualifying purchases. If you make a purchase through the link, it won't cost you more but I may earn a small commission. I only recommend products that I personally use and love!
Recipe ingredients

Ingredient notes
- Chicken thighs: you will need bone-in, skin-on chicken thighs. You could also substitute bone-in, skin-on chicken breasts or drumsticks, but will need to make adjustments for the time depending on the size of your chicken pieces. For this reason, I love using an oven-safe alarm thermometer, more on that later!
- Smoked paprika: this gives you that added little bit of smoky flavor that matches well with the BBQ sauce. But, if you don't have smoked paprika you can substitute regular paprika.
- BBQ sauce: you can use homemade or store bought, I used Sweet Baby Ray's. Either way, I like using a thicker sauce that has a higher sugar content to get a nice coating on the chicken that caramelizes well.
- Special equipment: in this recipe, I also use an oven-safe wire baking rack and a meat thermometer (I like my oven-safe alarm thermometer, but any thermometer will work!). I really recommend using a thermometer to test the doneness of the chicken. But, if you don't have a wire rack, check the FAQs for a workaround!
Step by step photos
1. If your chicken thighs have any excess skin or fat, trim it off. I like using kitchen shears for this!

2. Pat the chicken thighs dry very thoroughly with paper towels.

3. Rub some oil on the chicken (top, bottom and sides!). This helps the spices to adhere and the skin to crisp up.

4. Mix the spices together. I also like to place the mix in an empty spice shaker for easier application on the chicken!

5. Peel the skin back on the chicken and sprinkle on the seasoning mix. This step is key - this is how you can season the chicken meat itself in addition to the skin! You may need to wiggle your finger underneath first to help loosen the skin.
Then, replace the skin and generously season the top, bottom and sides of each thigh. Depending on how heavily you apply, you may have a little bit of the spice blend leftover.

6. Next, place the seasoned chicken thighs on an oven-safe wire rack placed over a baking sheet. The wire rack allows the hot air to circulate all around the chicken while it bakes and elevates it away from the dripping juices.
For easier cleanup, I like to line the baking sheet with foil and spray the wire rack with cooking spray before adding the chicken.

7. If you have one, now is a great time to use an oven-safe alarm thermometer. The one I have is the DOT Simple Alarm Thermometer by ThermoWorks. The beauty of this type of thermometer is that you can keep the probe in while the chicken bakes. When the correct temperature has been reached, an alarm will sound. So, it eliminates any guesswork!
If you have one of these, insert the probe into the largest piece, making sure you are hitting the thickest part, not touching any bone. Then, just place the chicken into the preheated oven and cook until it reaches 155 degrees.

8. Once the chicken thighs reach 155 degrees, take the chicken out (you should see some crispy skin by now!). Add the BBQ sauce to the top of the chicken. If you want a thinner coating, use a pastry brush. If you want a thicker coating, spoon it on and spread it around with the back of the spoon. You can also brush some on the underside of the chicken if you would like.
I also have a tip on how I like to apply the BBQ sauce, so please check that out in the tips and tricks section!

9. Then, place the chicken back in the oven and let it finish baking until the sauce has tacked up some and the internal temperature has reached at least 165 degrees. (For dark meat, I like to cook mine to around 170 degrees.)
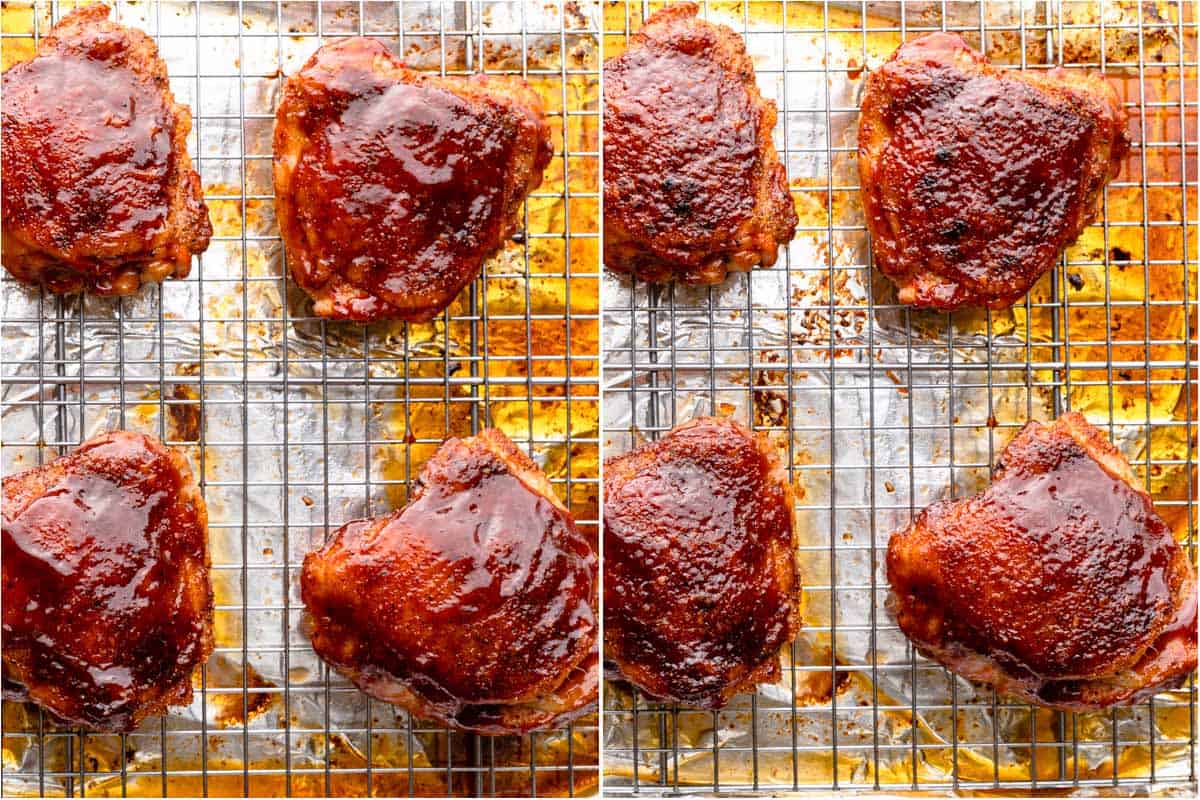
If you want the sauce to be even more caramelized, you can take the additional step of broiling the pieces for a few additional minutes! To show you the difference, the pieces straight out of the oven are on the left, and the broiled ones are on the right. (Please see the tips and tricks section for further discussion on broiling!)
Tips and tricks
How to get crispy edges on the chicken skin
As I mentioned, I have a little tip for getting a crispy edge on the chicken skin. But first, I need to state that, in my experience from testing this recipe numerous times, moisture (i.e. the BBQ sauce) is the enemy of crispness. So, unless you are going to batter and deep fry the chicken first to build up a sturdier crust (which sounds awesome, but is a whole different recipe), it will be an uphill battle to create a truly crisp oven-baked skin once the BBQ sauce is added.
So, I decided I needed to work around this fact rather than fighting it! Now when I apply the BBQ sauce, I always make sure to NOT paint the sauce on the very edges of the skin! That's it! That way, those parts stay dry and continue to crisp in the oven. You don't even miss that tiny bit of sauce, but when you bite into the chicken, you get a nice little bit of extra crunch.

Notice, I did not say that the entire surface of the skin will be super crispy. As I mentioned, the moisture in the BBQ sauce does limit the crispness of the skin due to its moisture content. But, for me, the crispy edges were enough to satisfy my craving for crispy skin!
Other tips and tricks
- As I mentioned, there is an optional step to broil the chicken after baking. This will help the sauce to caramelize even further and will create those slightly sticky, nearly burnt (but in a good way!) spots on the surface of the skin. So, if you like that deep caramelized sugar flavor, broiling afterwards is definitely the way to go!
- If you're going to broil, watch the chicken carefully. It only takes a couple minutes, and there is a fine line between "nearly burnt but in a good way" and actually burnt!
- Also, please be sure the wire rack you are using can withstand that direct heat! I used these baking racks from Checkered Chef (affiliate link). They are just bare metal with no coatings, and have withstood the broiling just fine. However, if your rack has any kind of coating, or if you are at all feeling unsure about it, just remove the rack. You can just place the chicken thighs straight on the tray before broiling.
Recipe FAQs
As I mentioned, I love my oven-safe alarm thermometer because you don't have to worry about timing, it will let you know when the desired temperature has been reached. However, if you don't have one of these no worries! Just check the thighs at the 30 minute mark with a regular meat thermometer. If your chicken thighs are small, you may want to check a bit sooner. If needed, you can always put the chicken back in the oven for a few more minutes.
By the way, even if you happen to overshoot the final temperature, you should still end up with juicy chicken. The dark meat is already more juicy than white meat, and the skin also help to retain moisture. So don't sweat it too much. Just remember, 165 degrees and above is the safe temperature to consume chicken. Plus, I like to cook dark meat to 170 or even 175 degrees to help dissolve the connective tissue, as recommended in this article by ThermoWorks.
If you don't have a wire rack, you can simply place the chicken thighs directly on a baking sheet (lined with foil if you want an easier cleanup!). Place them skin-side down first, and then flip them to skin-side up half-way through the initial cooking time. The skin may not be as crispy since it will have sat in some moisture in the pan during the first half of the cooking, but it will still taste great!
This main course would pair really well with all the classic BBQ sides of course: coleslaw, cornbread, green beans, and/or baked beans for example. If you want to keep things simple on a busy weeknight, I would suggest a fresh green salad or steamed/roasted veggies and crusty bread, or even boxed mac and cheese for the kids (I really mean for me!).
Related recipes


If you've tried this recipe, please leave a star rating and/or review in the comments section below, I would love to hear from you! You can also follow me on Facebook, Instagram and Pinterest. And sign up for my weekly newsletter to get recipes delivered straight to you!
Print📖 Recipe
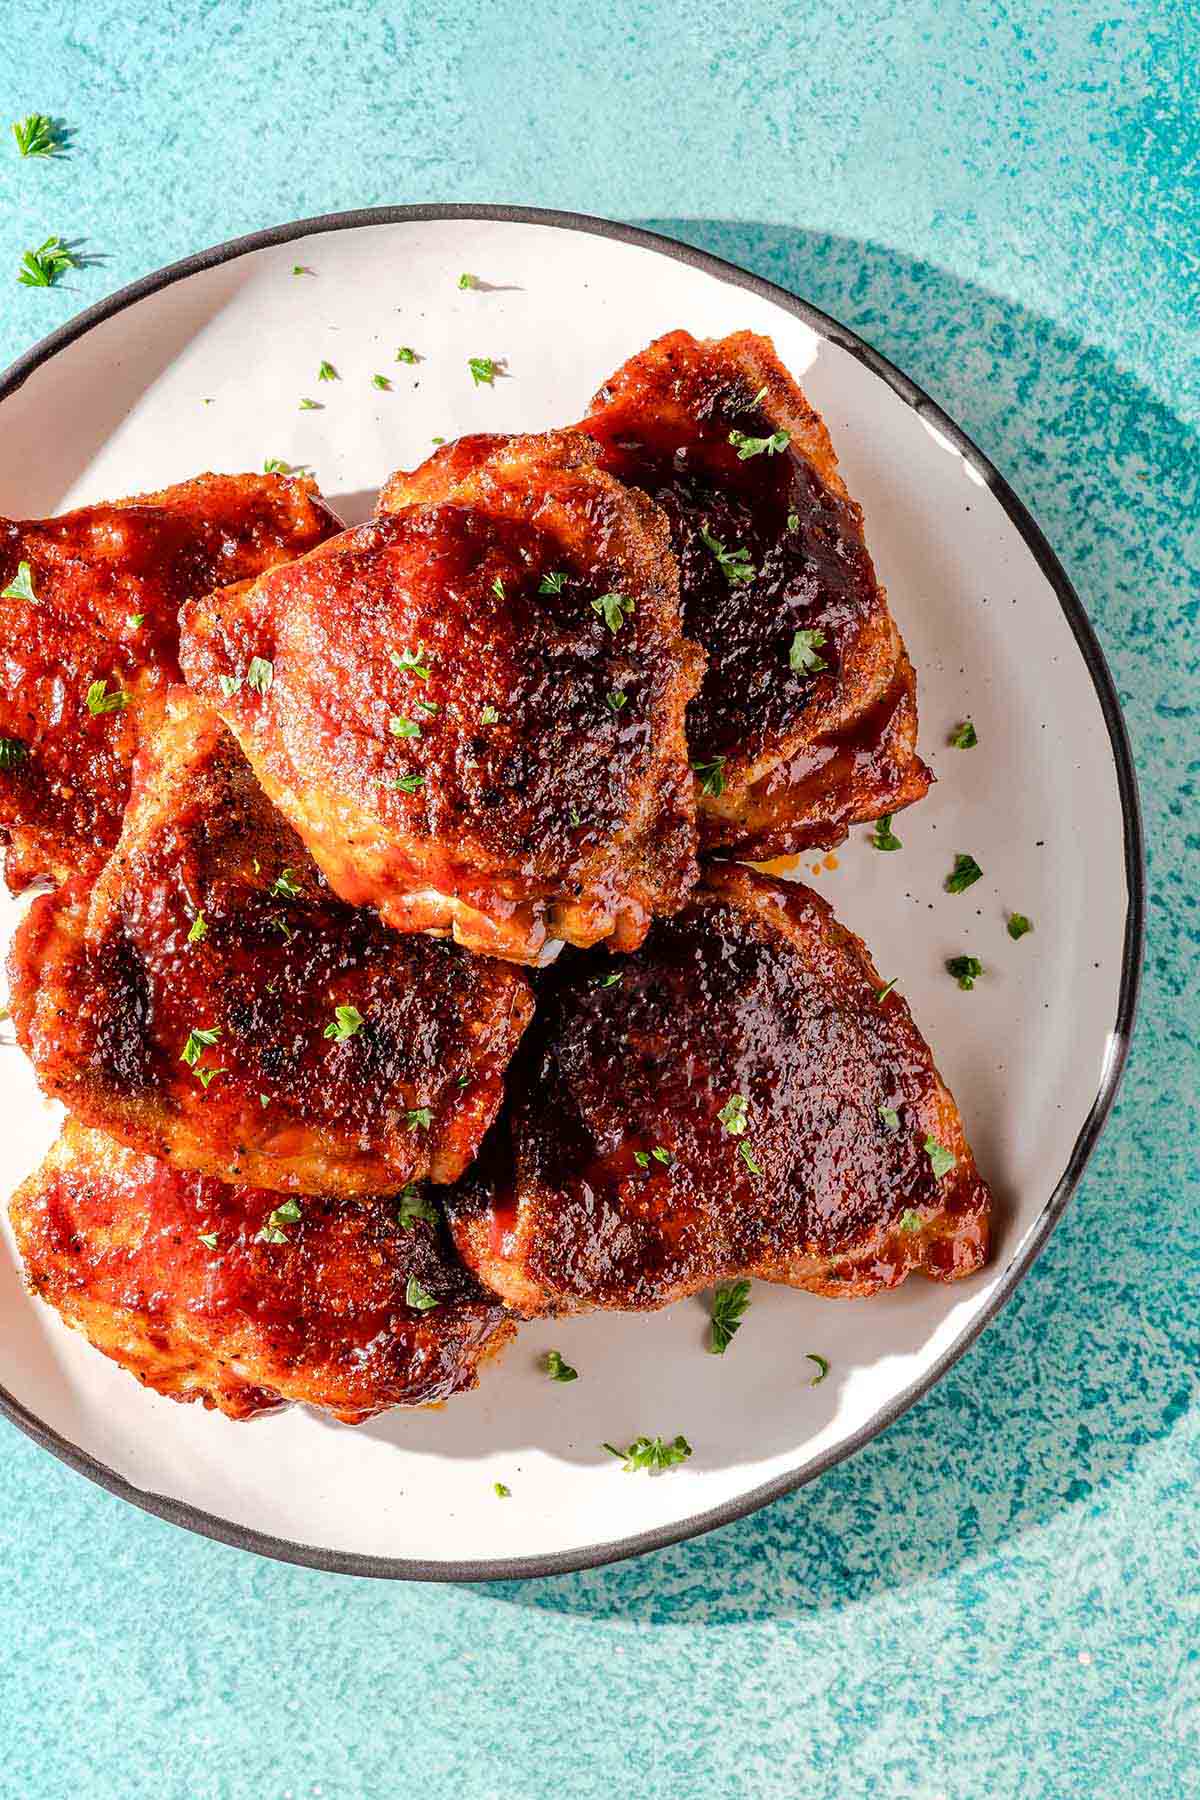
Baked BBQ Chicken Thighs
Chicken thighs are well seasoned with a smoky spice blend and baked in the oven, then brushed with barbecue sauce and baked again until nice and caramelized! For even more caramelization, you can give these a quick broil at the end!
- Prep Time: 10 minutes
- Cook Time: 40 minutes
- Total Time: 50 minutes
- Yield: 6 servings 1x
- Category: main course, entree
- Method: bake
- Cuisine: American
Ingredients
- 3 pounds bone-in, skin-on chicken thighs (about 6 large or 8 small chicken thighs)
- 2 teaspoons olive or vegetable oil
- 1 tablespoon smoked paprika
- 1 teaspoon kosher salt
- ½ teaspoon ground black pepper
- 2 teaspoons onion powder
- 2 teaspoons garlic powder
- ¼ - ½ cup barbecue sauce
Instructions
- Preheat the oven to 425 degrees.
- While the oven is preheating, trim any excess loose skin or fat from the chicken thighs. With paper towels, dry the entire surface of the chicken thighs very well. Then, rub the entire surface of the chicken thighs with oil.
- Mix together the smoked paprika, kosher salt, ground black pepper, onion powder and garlic powder in a small bowl.
- Gently peel the skin of the chicken thighs back, enough that you can sprinkle the seasoning mix onto the meat that lies underneath the skin (you may need to wiggle your fingers underneath the skin to loosen it first). After seasoning, replace the skin and then generously sprinkle the seasoning onto the outer surface of the chicken skin, as well as the bottom and sides.
- Place the seasoned chicken thighs, skin side up, on a baking sheet fitted with an oven-proof wire rack. Bake in the preheated oven until the chicken thighs reach an internal temperature of 155 degrees (about 30 minutes).
- Remove the baking sheet from the oven. Brush the barbecue sauce on the skin and sides of the chicken using a pastry brush. If you want the edges of the skin to remain crisp, avoid brushing the skin edges with the barbecue sauce. If desired, you can also lift the chicken thighs up gently with tongs to brush the underneath surface.
- Return the chicken to the oven and continue to bake until the sauce has tacked up some and the internal temperature of the chicken has reached at least 165 degrees (or 170 degrees, see notes), about 4 - 7 minutes.
- If you want a more caramelized surface, position the baking sheet in the oven so the top of the chicken is a few inches below the top broiler (I used the second oven rack position from the top). Then broil the chicken for 2 - 3 minutes, watching carefully during broiling so the chicken doesn't burn. Please note: If your baking rack can't withstand the high direct heat of the broiler (for example, if it has a coating on it), remove it before broiling.
Notes
If you have an empty spice container, place the seasoning in there to make quick work of the sprinkling!
You may have a small amount of the seasoning leftover depending on how generously you seasoned the chicken, I had about 2 teaspoons left over.
For good caramelization, choose a barbecue sauce with a higher sugar content. I used Sweet Baby Ray's.
The amount of barbecue sauce you need will depend on how thick you spread it on and whether you choose to brush the underside as well. If you would like a thicker application of sauce, spoon it on and use the back of the spoon to spread it around rather than brushing it on with a pastry brush.
If you don't have an oven-safe wire rack, place the chicken directly on the baking sheet, skin side down. Flip the chicken to skin side up half way through the first cooking period.
Chicken is safe to eat once it has reached an internal temperature of 165 degrees, but I like to bake mine to 170 to help dissolve some of the connective tissue present in dark meat (aka it's more tender!).


Leave a Reply