

Sloppy Joe sliders are a fun, easy and festive party snack or appetizer that you can make in only about 30 minutes! You can make them in the traditional slider size for a heartier dinner or snack, or make them using mini party rolls for a cute, two bite appetizer.
Note: this post was originally published in 2020 and updated in 2021 and 2026 with improved instructions and new photos.
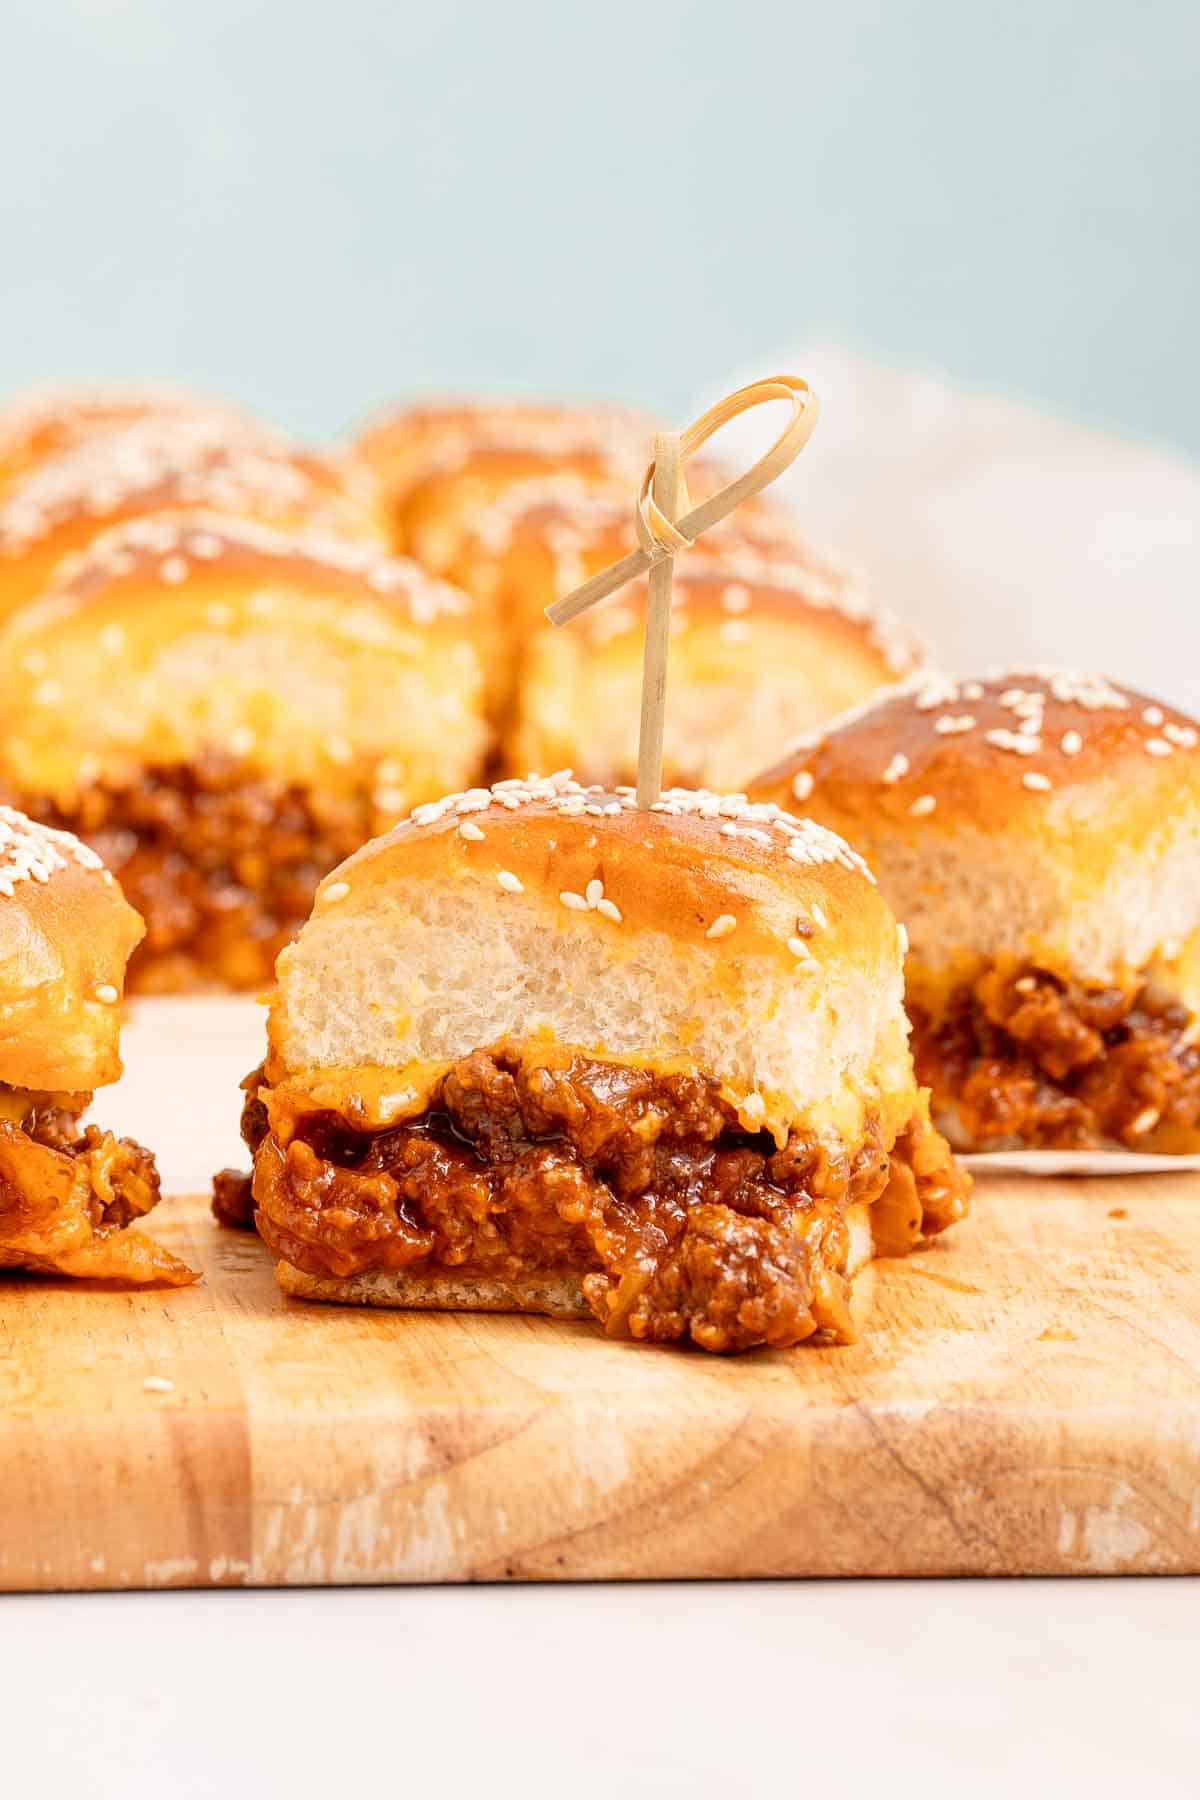
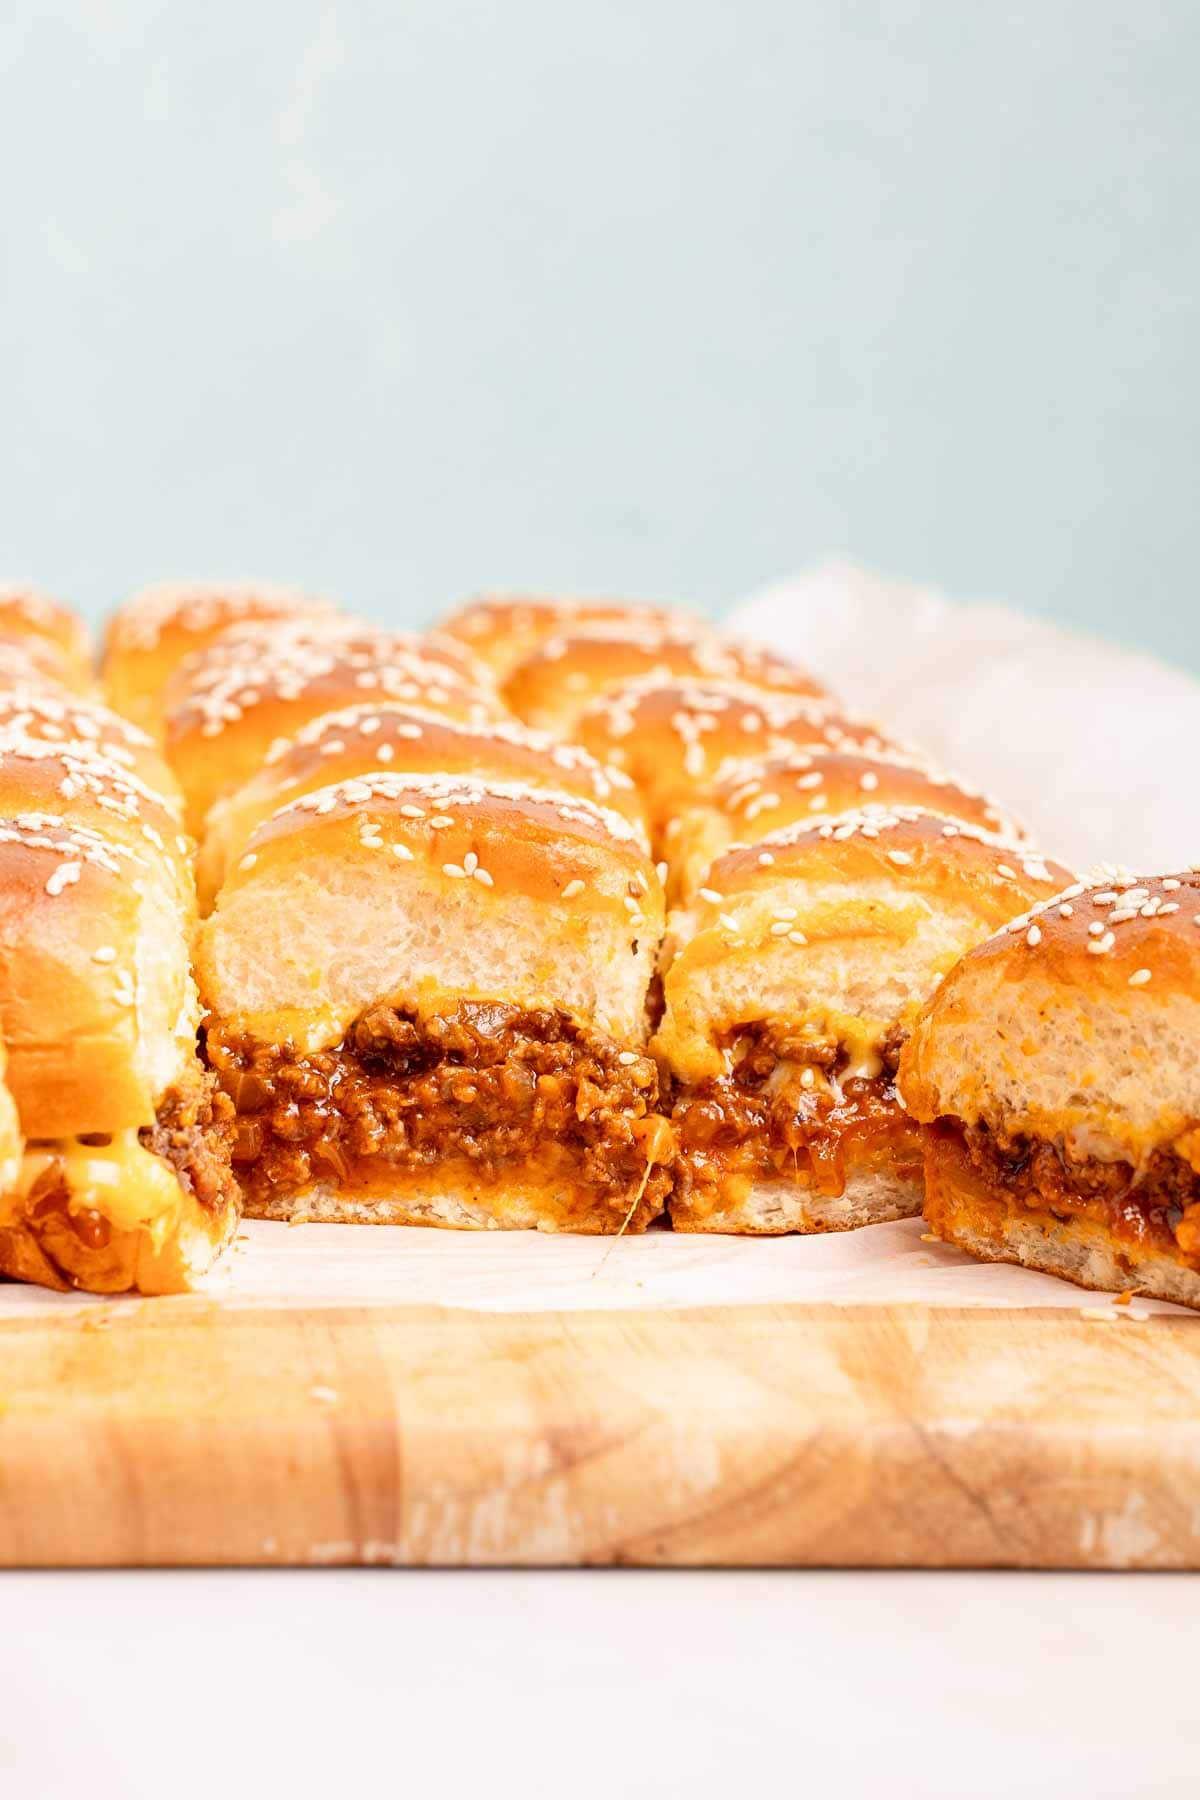
The classic sloppy Joe dinner has been transformed into a fun party snack or appetizer! These sweet and tangy sloppy Joe sliders are easy to make with basic ingredients, and in only about 30 minutes.
You can either make traditional sliders, or, super cute mini sliders. I have included info in the post on what kind of rolls you need to make both versions.
Party time!
Looking for more quick and easy party appetizers? Try my recipes for marinated mozzarella balls, easy crab spinach artichoke dip, or goat cheese crostini.
And if you love sloppy Joes as much as my family does, check out my garlic bread sloppy Joes recipe!
Jump to:
Recipe ingredients
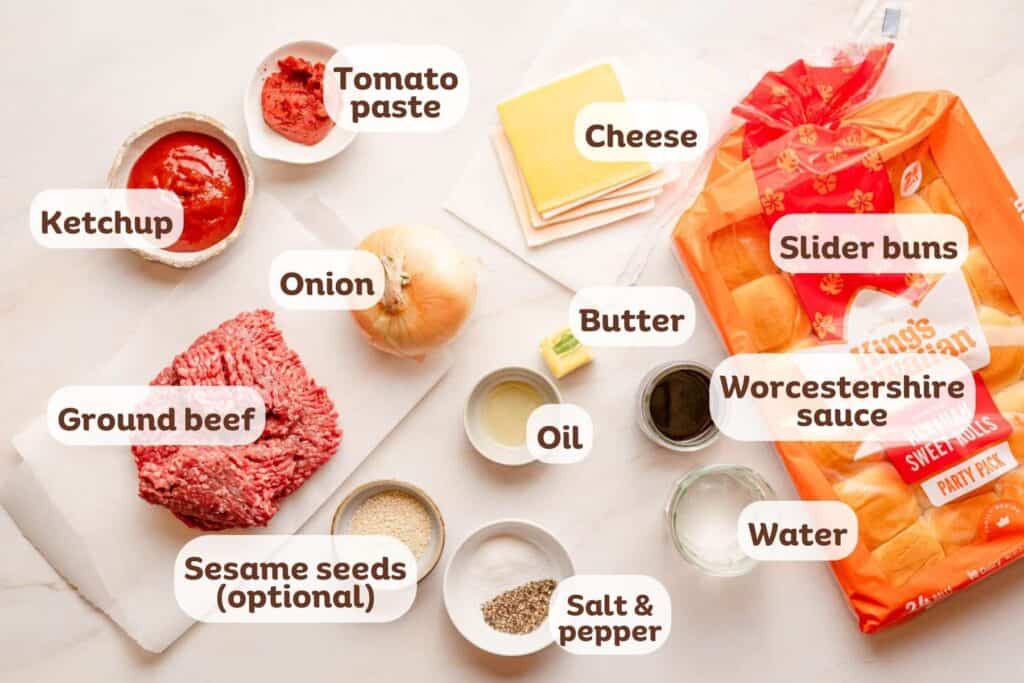
Ingredient notes
- Ground beef: I used 93% lean beef, which leaves very little extra grease in the pan after it's browned. So, there's no need to drain the beef before adding extra ingredients. If you have regular ground beef, just drain it after browning.
- Onion: a sweet onion adds a little more sweet flavor which I think works well with the sweet and tangy filling. If you don't have one however, feel free to use a yellow or white onion instead.
- Slider buns: you can use either regular slider buns, or mini "party" rolls. I explain more about each roll option below!
Step by step photos
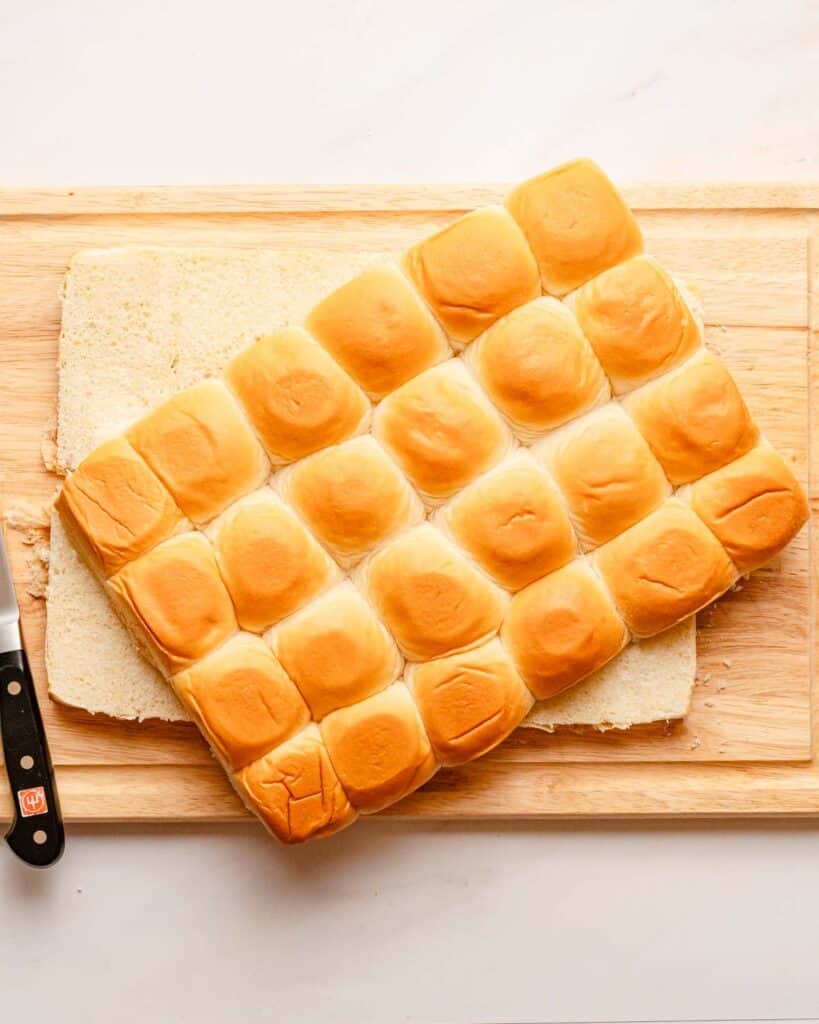
Step 1
If using mini rolls, slice them in half horizontally, and set aside.
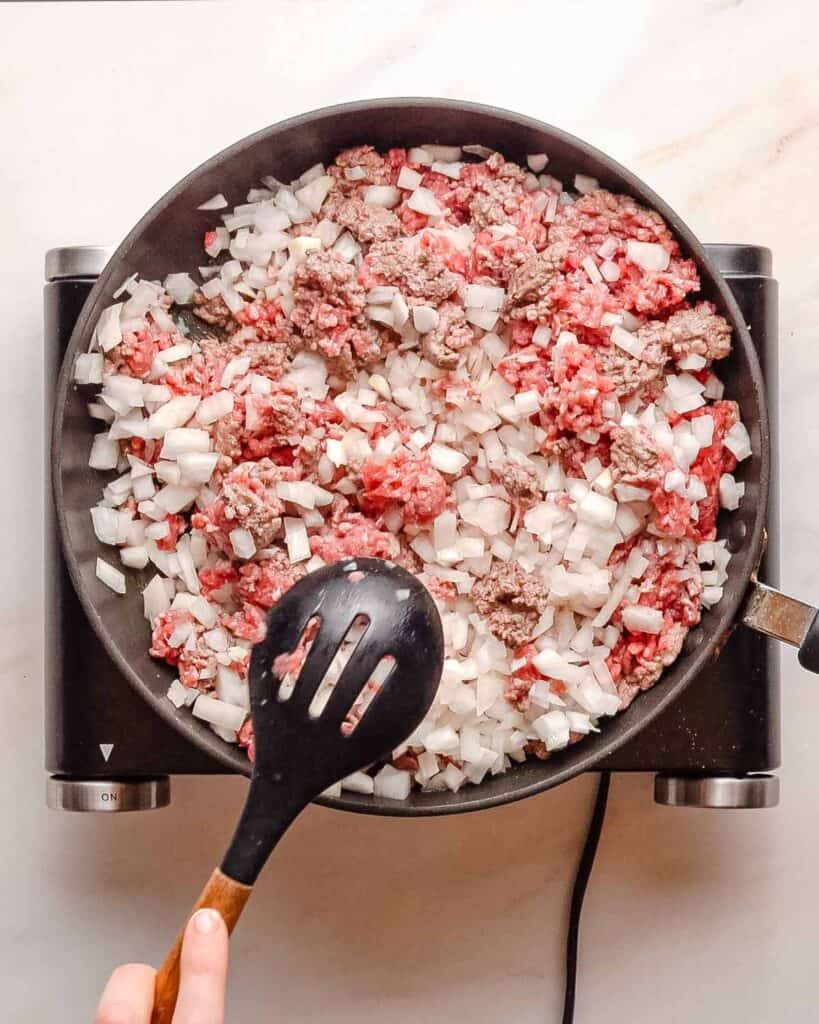
Step 2
Start browning the ground beef in a skillet. Then add the finely diced onion.
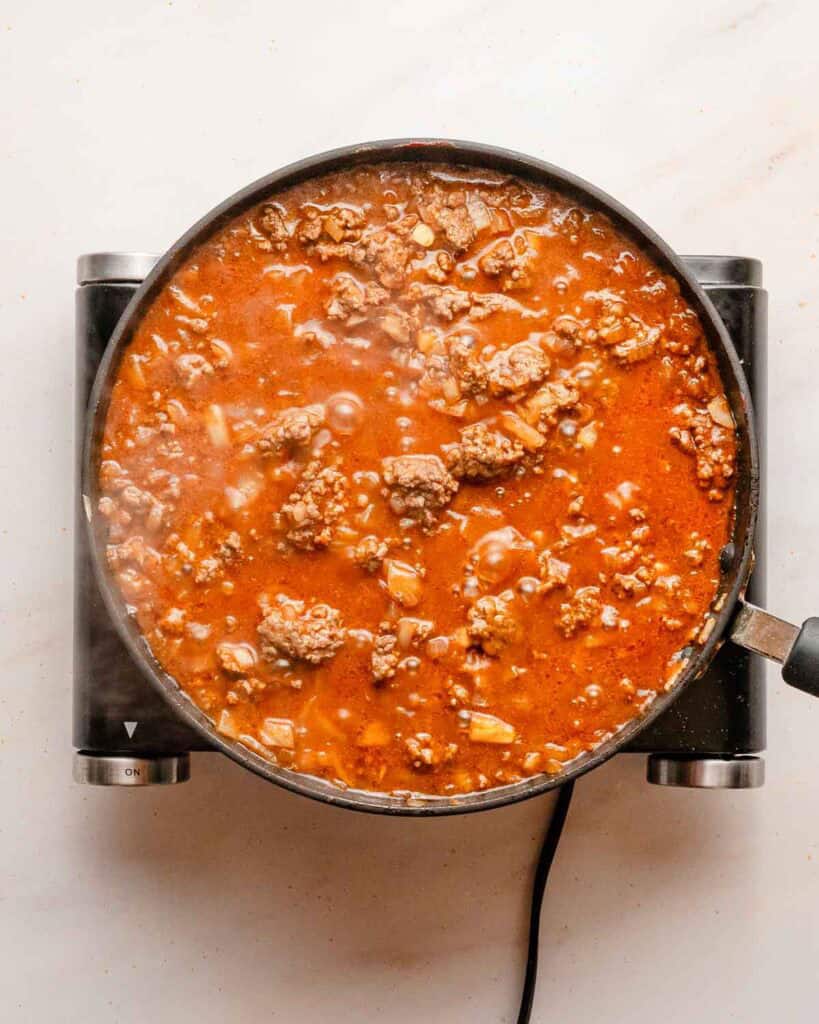
Step 3
Once the onion is translucent, add the ketchup, tomato paste, Worcestershire sauce, and water. Simmer the sloppy Joe filling for about 4 - 5 minutes.
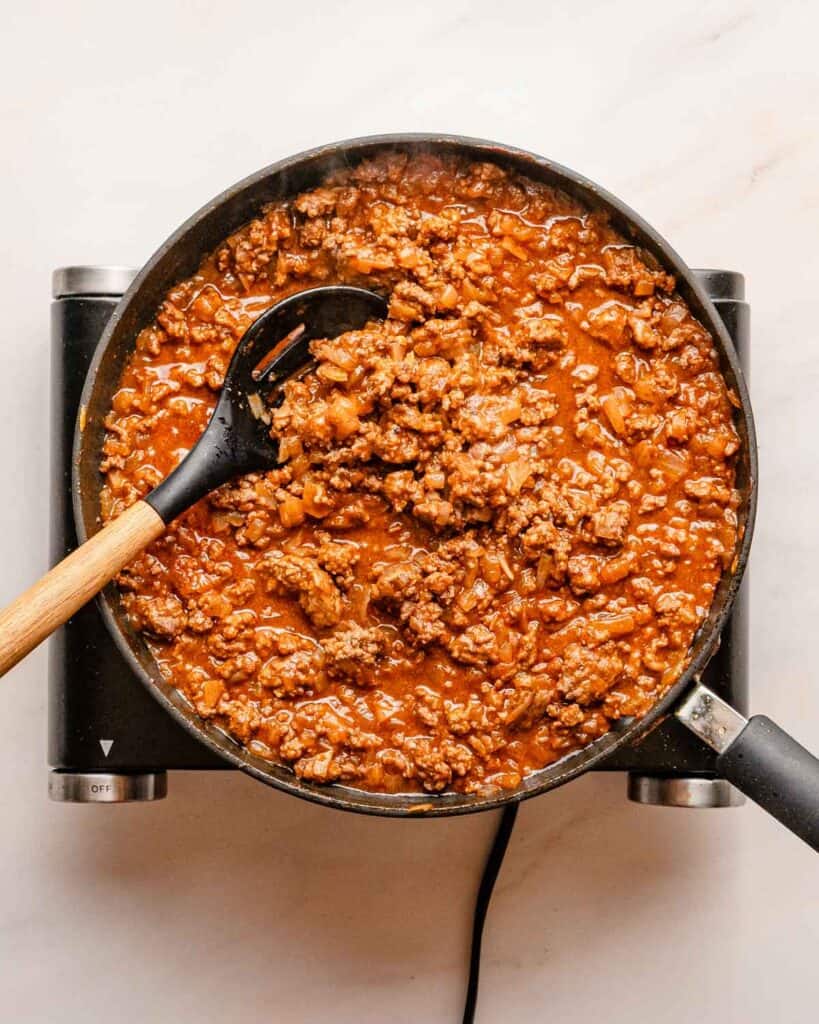
Step 4
The filling is done when it's thickened, like this.
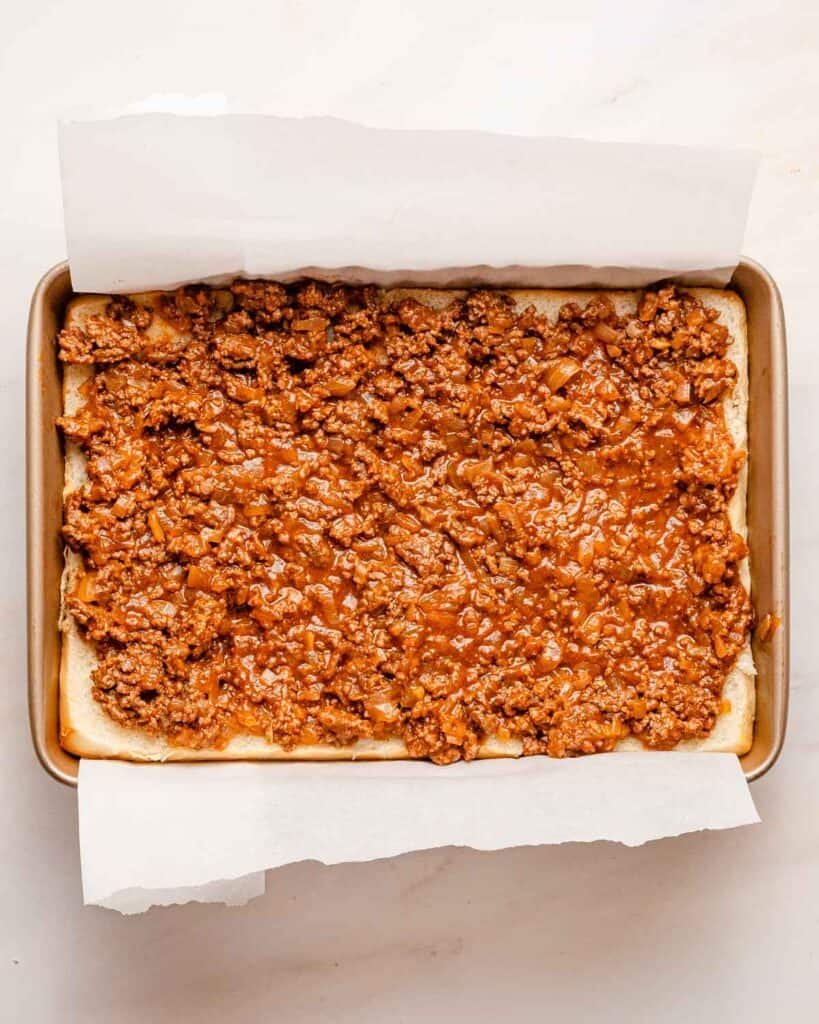
Step 5
Line a 9 x 13 inch pan with parchment paper, and brush it with melted butter. Place the bottom of the rolls in the pan, and top with the sloppy Joe filling.
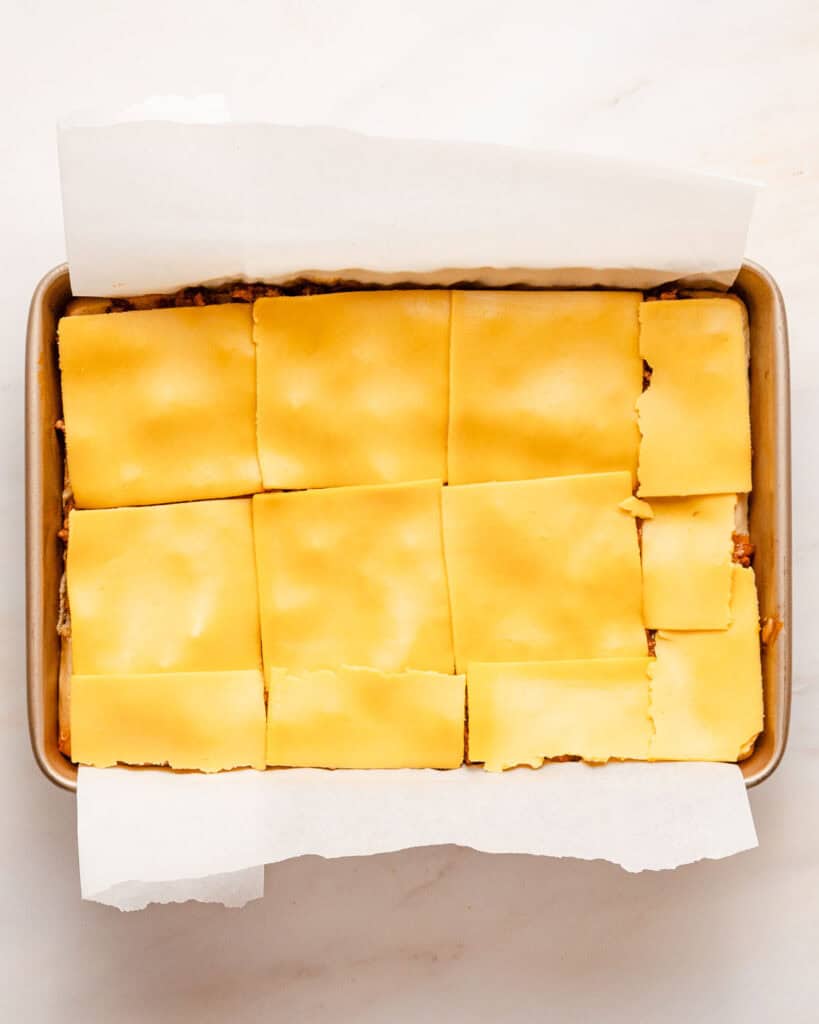
Step 6
Add the cheese slices on top.
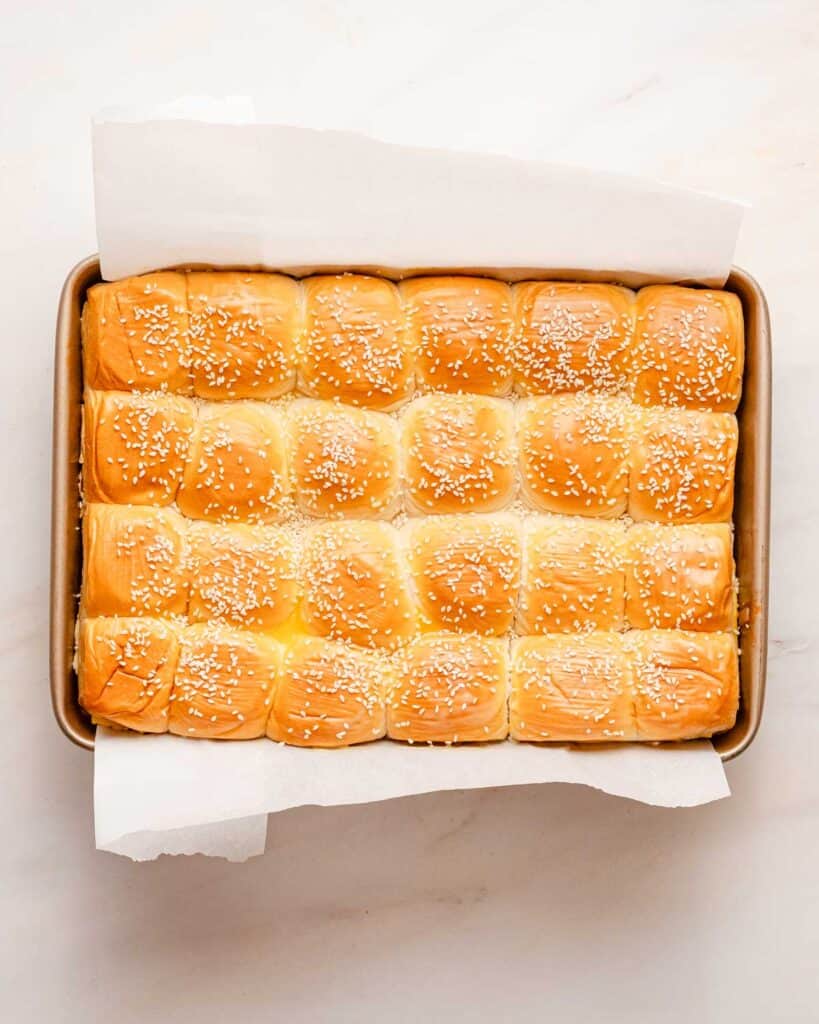
Step 7
Place the top half of the rolls on top. Brush with melted butter, and sprinkle with sesame seeds (optional). Bake until the cheese is melted and buns are browned.
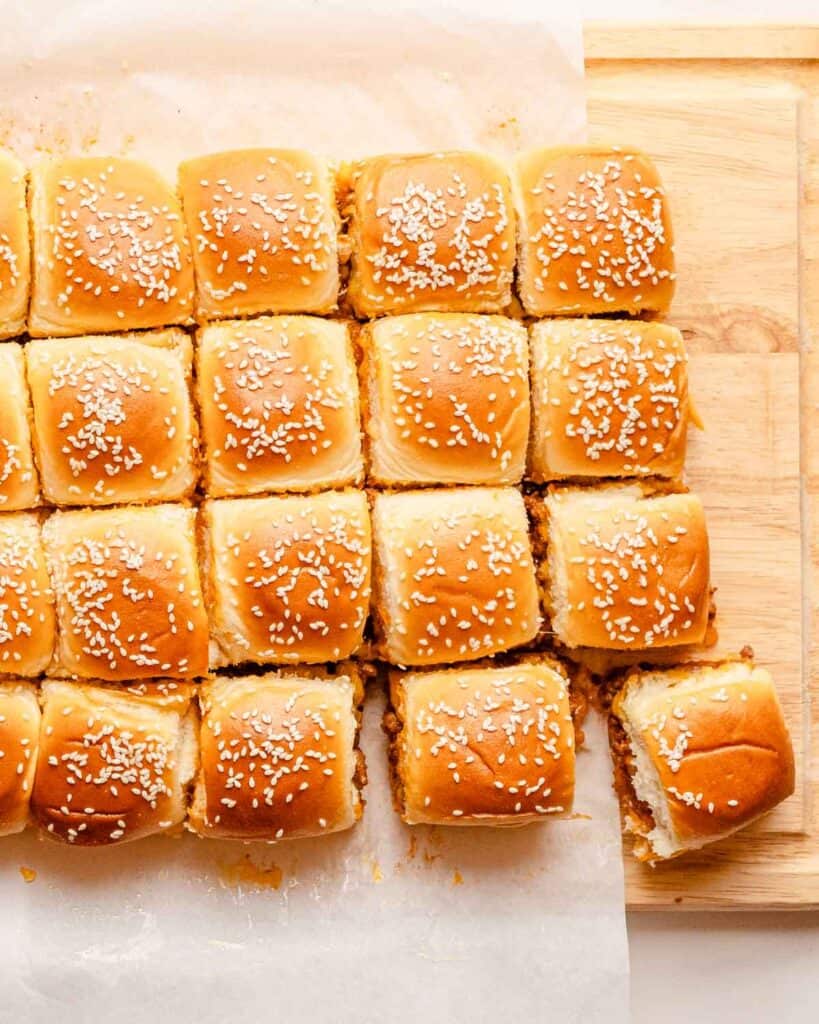
Step 8
Lift the sliders from the pan using the parchment paper flaps. Cut the sliders apart with a serrated knife and enjoy!
Buns for sloppy Joe sliders
For this recipe you can either make regular sized sliders, or cute mini sliders like I did here!
- If you want to make regular-sized sliders, you will need 12. This would be a good option if you want to serve these for dinner or as a heartier party food. Just look for anything labeled "slider buns."
- Mini sliders are great as a 2-bite appetizer. Look for small rolls in packs of 24, each about 2 inches across. They may be labeled "party rolls." Martin's and King's Hawaiian both make a version. I used the King's Hawaiian brand Original Hawaiian Sweet Rolls 24 pack.
Tips and tricks
- When slicing the mini buns horizontally to separate them, try to leave enough bottom bun to give structure to the sloppy Joe. If the bottom portion is too thin, the sliders will be harder to hold.
- When cutting the finished mini sliders apart, don't worry about following the line of the top buns exactly since they probably won't be in perfect 90 degree angles. Just cut straight across, following the divisions in the buns as closely as you can. You won't be able to really notice after they are all cut!
Recipe FAQs
You can make the filling ahead of time and store it in the fridge, covered, for 3 - 4 days. Then, when you want to assemble the sliders, just heat it up in the microwave or in a skillet, and continue on with the rest of the recipe instructions.
Because the sloppy Joe filling is so moist, you will need to assemble and bake the sliders right before serving so the bread doesn't get overly soggy.
You can definitely freeze the prepared filling. Once it's cooled down, just place it in an airtight container and freeze for 2 - 3 months. However, the prepared sliders need to be eaten right away for the best flavor and texture!
If you are serving these sliders as a dinner entrée, they would taste great with buttery corn on the cob, a green salad, or even a cup of smoky black bean soup!
For a party, they would serve well as a heartier, more filling appetizer, so the rest of the snacks could be a little lighter, like chips and dip, cut fruit, a cheese platter, etc.
Related recipes


If you've tried this recipe, please leave a star rating and/or review in the comments section below, I would love to hear from you! You can also follow me on Facebook, Instagram and Pinterest. And sign up for my weekly newsletter to get recipes delivered straight to you!
Print📖 Recipe
Sloppy Joe Sliders

Sloppy Joe Sliders are an easy to make, crowd-pleasing party appetizer or snack! These hearty sliders can be made in only about 30 minutes.
- Prep Time: 7 minutes
- Cook Time: 23 minutes
- Total Time: 30 minutes
- Yield: 12 servings 1x
- Category: appetizers, Main course, snacks
- Method: Baking, stove top
- Cuisine: American
Ingredients
- 2 tablespoons (28 g) butter, melted
- 1 teaspoon neutral oil (canola, vegetable, etc.)
- 1 ½ pounds (680 g) 93% lean ground beef (see note 1)
- 1 large sweet onion, finely diced
- ¾ cup (204 g) ketchup
- 3 tablespoons (50 g) tomato paste
- ¼ cup (59 ml) Worcestershire sauce
- ¾ cup (177 ml) water
- salt and pepper, to taste
- 12 slider buns or 24 mini "party" rolls (for mini sliders)
- 9 slices American cheese (or any melting cheese, such as Monterey Jack or mild cheddar)
- 1 tablespoon sesame seeds (optional)
Instructions
- Preheat oven to 350 degrees F.
- Line a 9 x 13 inch pan with parchment paper, leaving some to overhang on the sides. (See note 2.) Brush bottom of the lined pan with a thin layer of melted butter, reserve the remaining melted butter for the top of the buns. Set pan and remaining butter aside.
- For mini sliders using party rolls: Place the party rolls on a cutting board, leaving them attached. Using a large serrated knife, cut the party rolls in half horizontally. Set aside.
- Heat the oil in a large skillet over medium-high heat. Add the ground beef and cook for 2 - 3 minutes until beginning to brown, breaking up into small chunks with a wooden spoon. Season beef with salt and pepper.
- Add the finely diced sweet onion and continue to cook, stirring frequently, for 3 - 4 minutes, until the onion is translucent. Season again with salt and pepper.
- Turn heat down to medium-low. Add the ketchup, water, Worcestershire sauce, and tomato paste. Stir to combine and simmer for 4 - 5 minutes, or until the sauce thickens. Taste the sloppy Joe filling and add more salt and/or pepper if needed.
- Place the bottom half of the slider buns or party rolls on the butter-brushed pan. Do not separate the bottom rolls from each other.
- Distribute the sloppy Joe filling evenly across the bottom buns. Top with sliced cheese. You may need to break a couple slices in half to better fit the last section of the pan. Then add the slider bun/party roll tops on top of the cheese (do not separate tops from each other).
- Brush the tops with remaining melted butter and sprinkle with sesame seeds (seeds are optional).
- Bake in the preheated oven until the buns are browned and the cheese is melted, 9 - 11 minutes.
- For mini sliders: Use the overhanging parchment paper to lift the mini sloppy Joe sliders out of the pan, and remove them to a cutting board. Cut the mini sloppy Joe sliders apart using the large serrated knife. For regular sliders: remove from the pan individually by hand or using a spatula. If needed, cut apart with the edge of a spatula or small knife. Serve immediately.
Notes
1. Using 93% lean ground beef saves you from having to drain excess grease from the pan after browning the meat. However, you can substitute other ground beef, just carefully drain any excess grease from the pan before adding in the liquid ingredients.
2. Lining the pan with parchment paper with some overhang on the sides makes it very easy to lift out the mini sliders from the pan so they can be cut apart before serving. If you are using regular-sized slider buns, feel free to line the pan, but it's not as necessary since the buns can be removed more easily from the pan one-by-one. If you choose not to line the pan, still brush the bottom of the pan with butter.
The nutrition information below is an estimate provided by an online nutrition calculator, and should not be considered a substitute for professional medical, health, or nutritional advice. The nutrition counts of your dish will vary based on the brands and exact amounts of ingredients used. See our full nutrition disclosure policy.
Nutrition
- Serving Size: 1/12 recipe
- Calories: 384
- Sugar: 15.3 g
- Sodium: 619 mg
- Fat: 13.7 g
- Saturated Fat: 7.2 g
- Carbohydrates: 40.8 g
- Fiber: 1.2 g
- Protein: 25.1 g
- Cholesterol: 77 mg


Mary says
Very, Very good. I finally see what the hype is about!!! Recipe is good I added a little smoked paprika, garlic granules and chili powder could of used some jalapeños if you like spicy! I recommend this recipe 🫶🏼
Kate says
Thank you Mary for trying the recipe and sharing your feedback, your additions sound like they would make the sloppy joes even more delicious! Thanks again 🙂