This recipe for pan seared shrimp is the perfect quick and easy main course - it's ready to enjoy in only 10 minutes! Plus, with a special cooking technique, you will get tender, juicy shrimp with the perfect amount of browning on the edges, without the risk of overcooking!

Pan seared shrimp has got to be one of the most simple and quick ways to prepare shrimp. All you need are peeled and deveined shrimp, a few basic seasonings, and a non-stick skillet.
But, even though searing shrimp is so quick and easy, this pan seared shrimp is still a main course worth celebrating. Tender, juicy shrimp, perfectly seasoned, with a squeeze of fresh lemon juice, maybe a drizzle of melted butter...divine!
So, next I will talk a little bit more about why pan searing shrimp is such a good method, and, how to cook the shrimp so you get juicy, succulent, NOT overcooked shrimp, every single time!
Jump to:
Benefits of pan searing
- As I mentioned, pan searing shrimp is super quick. This recipe is ready in only about 10 minutes, start to finish.
- You don't need any fancy equipment or an elaborate list of ingredients, just a non-stick skillet and some simple seasonings (plus shrimp of course, and a bit of oil).
- By cooking the shrimp in a pan on the stove top, you can very easily monitor how quickly the shrimp is cooking, thus helping you avoid overcooking the shrimp.
How to pan sear shrimp perfectly
When developing this recipe, I came across this article from Cook's Illustrated: A Smarter Way to Pan-Sear Shrimp. And let me tell you, this was a game-changer for me! In my opinion, their cold-start method is the hands-down, best way for pan searing shrimp. Perfectly cooked (but not overcooked!) shrimp, with nicely browned edges, and a juicy, succulent interior.
Rather than getting the skillet screaming hot before adding the shrimp, this method does the reverse. First, the shrimp are placed in a cold skillet, and then heated. When the shrimp are browned on the underside, the shrimp are finished on the second side with the stove off. The residual heat from the pan is enough to finish the shrimp to perfection.
The cold-start method helps the shrimp to stay flatter in the pan, rather than twisting up, which is better for even browning. And, this more gentle cooking method gives you way more control over this notoriously quick cooking protein, without overshooting it and ending up with tough, chewy shrimp.
I adapted my easy recipe for pan seared shrimp using their cold-start method, so I want to give all the props to Cook's Illustrated, you should definitely check out their article on pan seared shrimp for more info!
Recipe ingredients
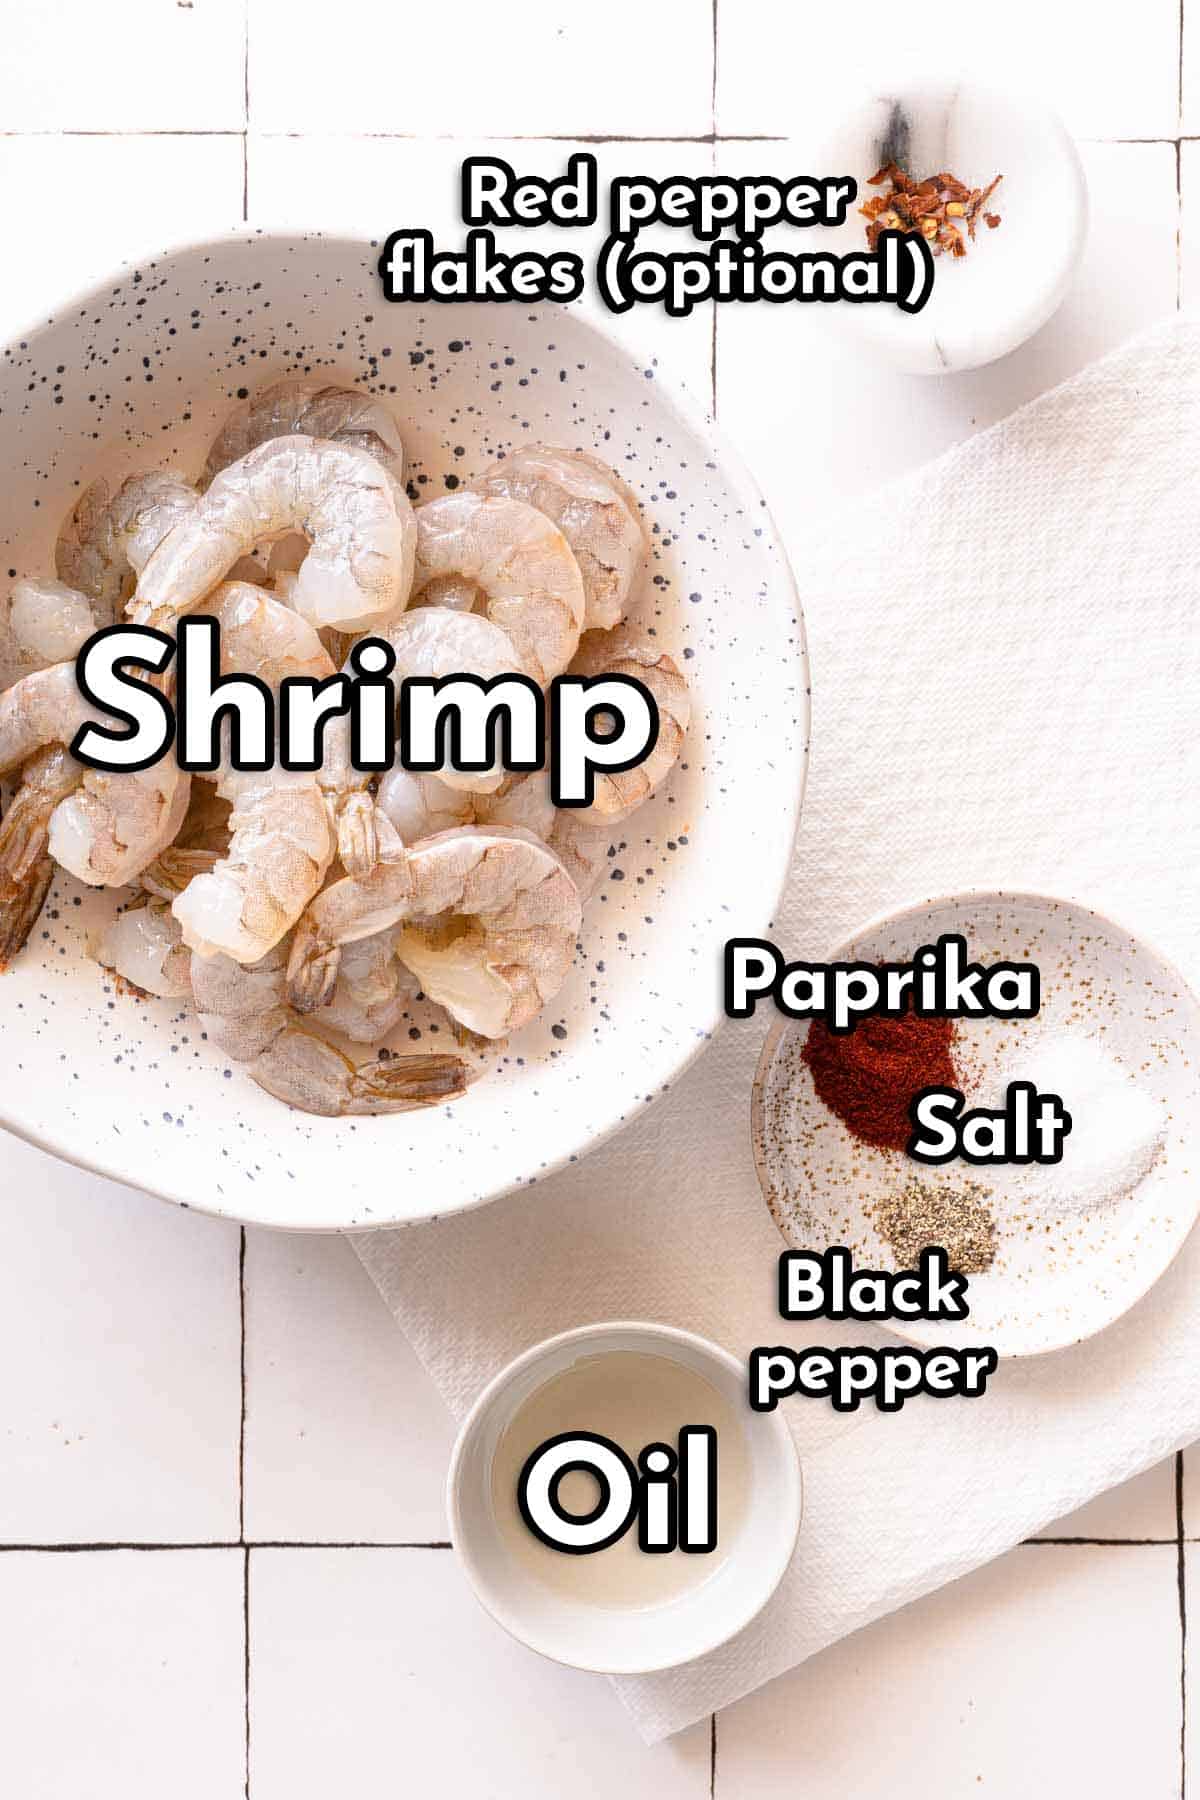
Ingredient notes
- Shrimp: you will need thawed (not frozen) jumbo shrimp that have been peeled and deveined. Leaving the tails on (or off) is up to you.
- Salt: I used Diamond Crystal kosher salt, which is quite light and flaky. Therefore, if substituting table salt, use only half of what the recipe calls for to avoid oversalting.
- Oil: you just need a neutral cooking oil, like avocado oil or vegetable oil.
Step by step photos
Here is a step by step breakdown on how to make seared shrimp. If you would like to see a brief slideshow of these steps, check out my web story!
1. The first step is to thoroughly pat the shrimp dry all around with clean paper towels. This helps the shrimp to get a nice sear in the pan!

2. After drying the shrimp, add the oil and seasonings to the bowl. (It doesn't matter what order you add these.)
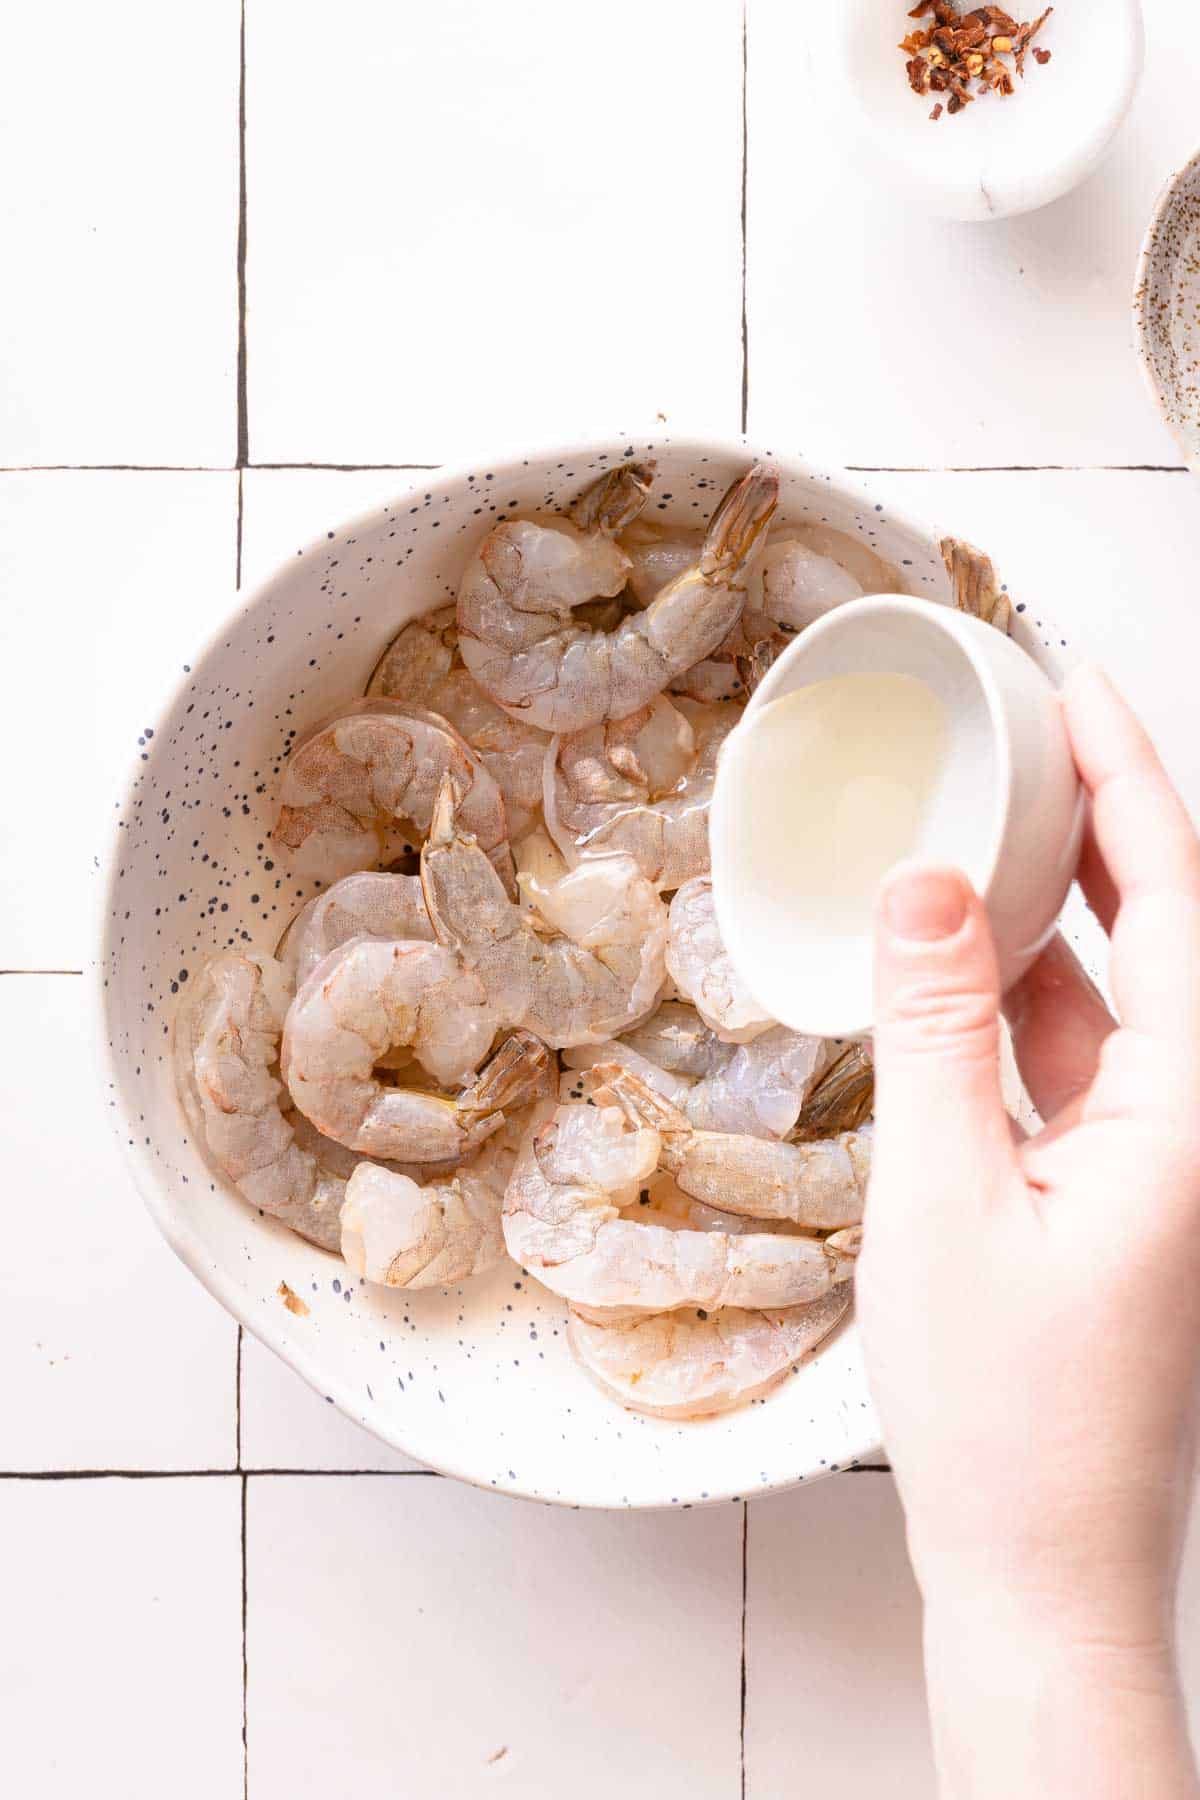

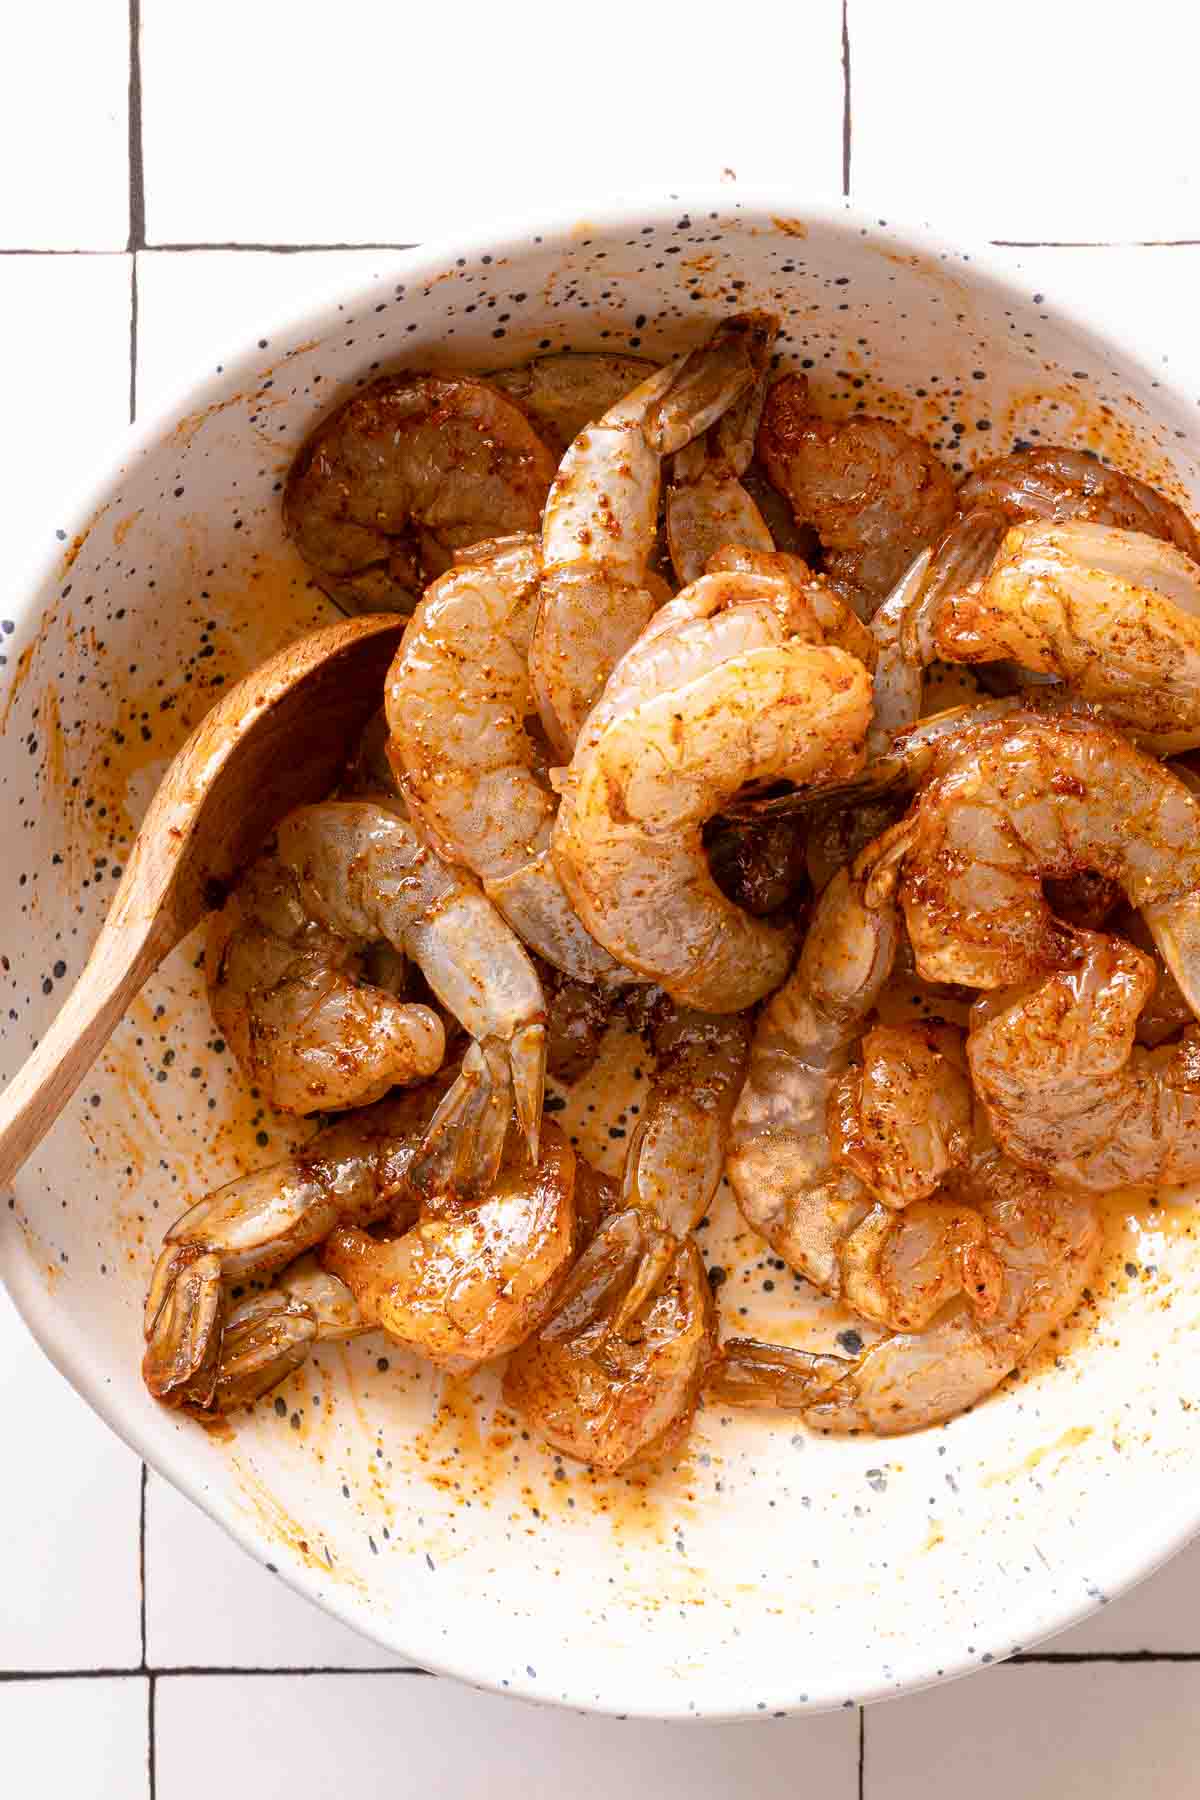
3. Next, toss the shrimp with the oil and seasonings until all the shrimp are evenly coated.

4. Now, we are ready to start searing shrimp! In a large non-stick skillet, arrange the shrimp so they are as spread out as possible. Then turn the burner on to high heat.
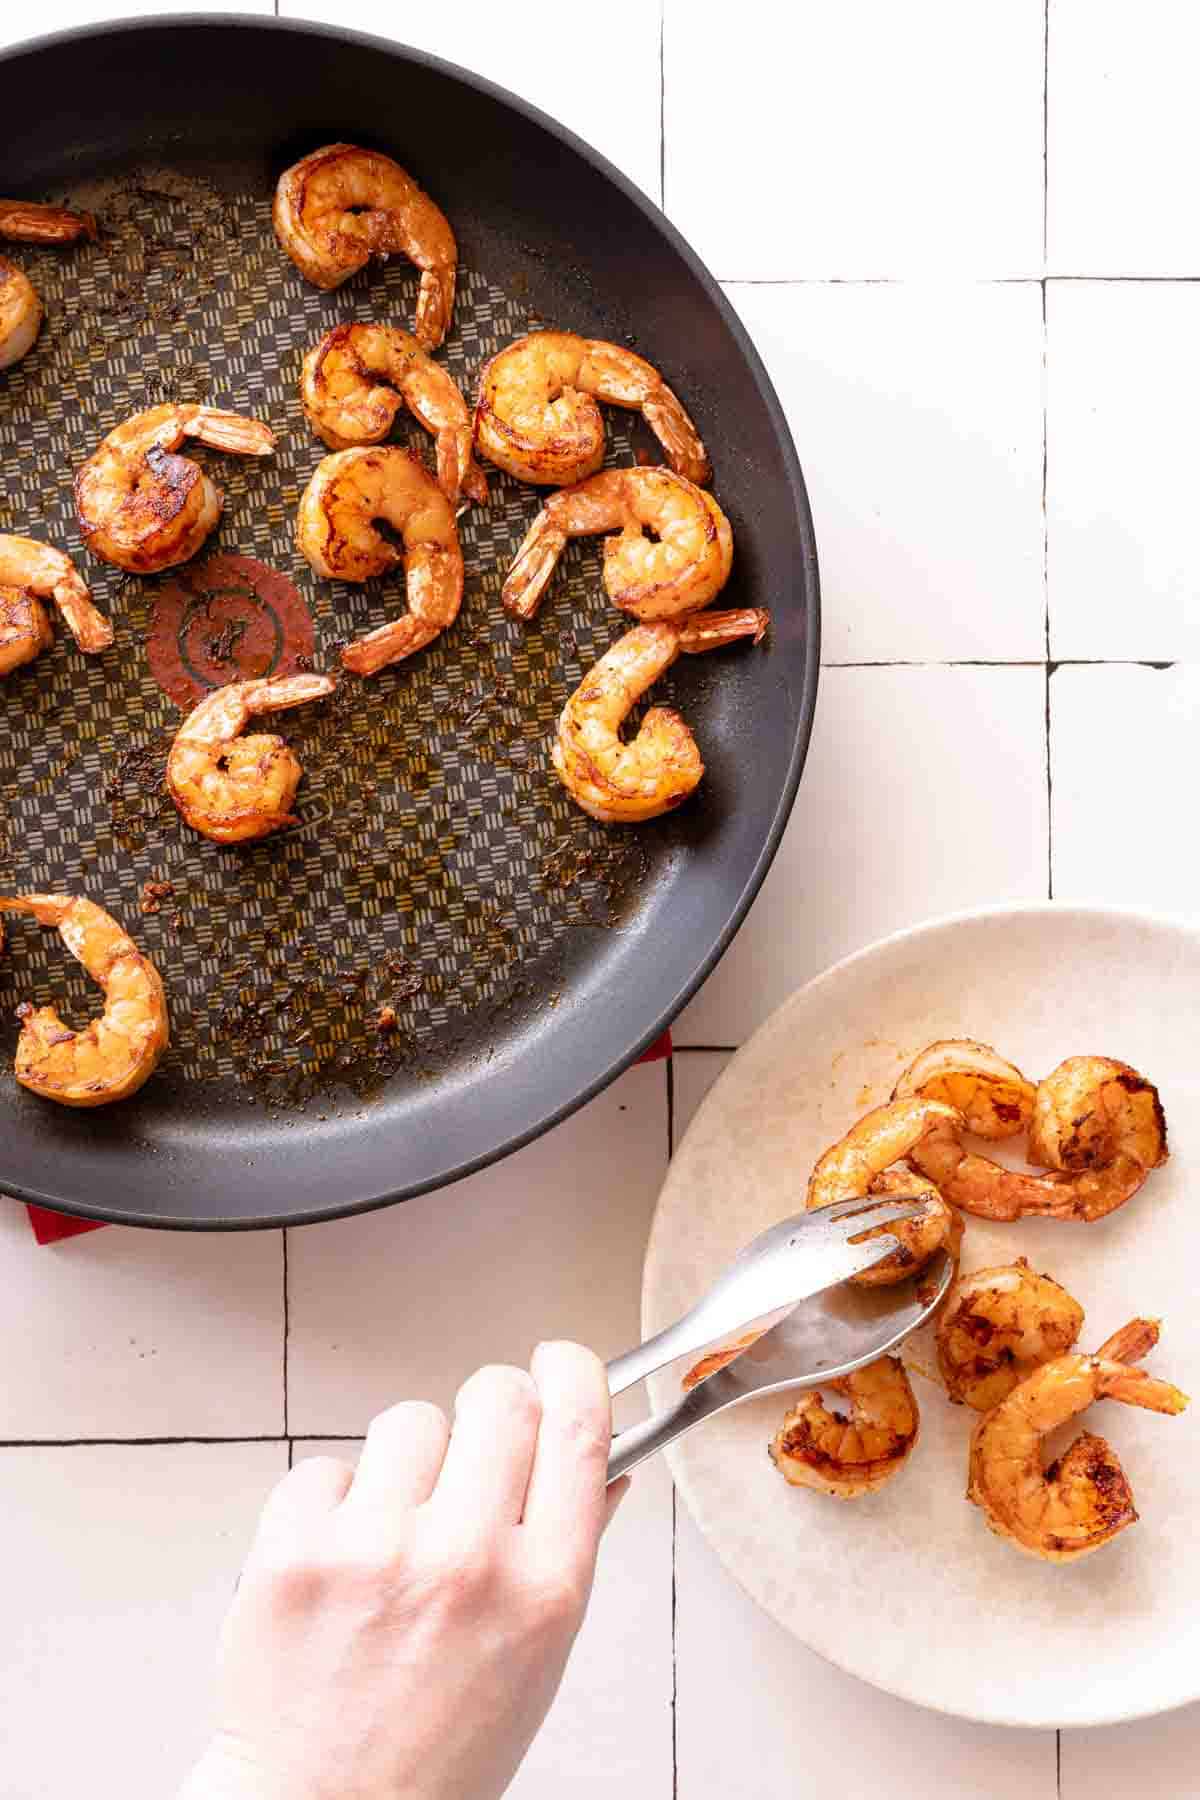
Cook the shrimp for about 3 - 4 minutes, without moving the shrimp. When the perimeter of the shrimp start to turn opaque, and the underside of the shrimp are browned on the edges, turn off the stove. Then, flip over each shrimp.

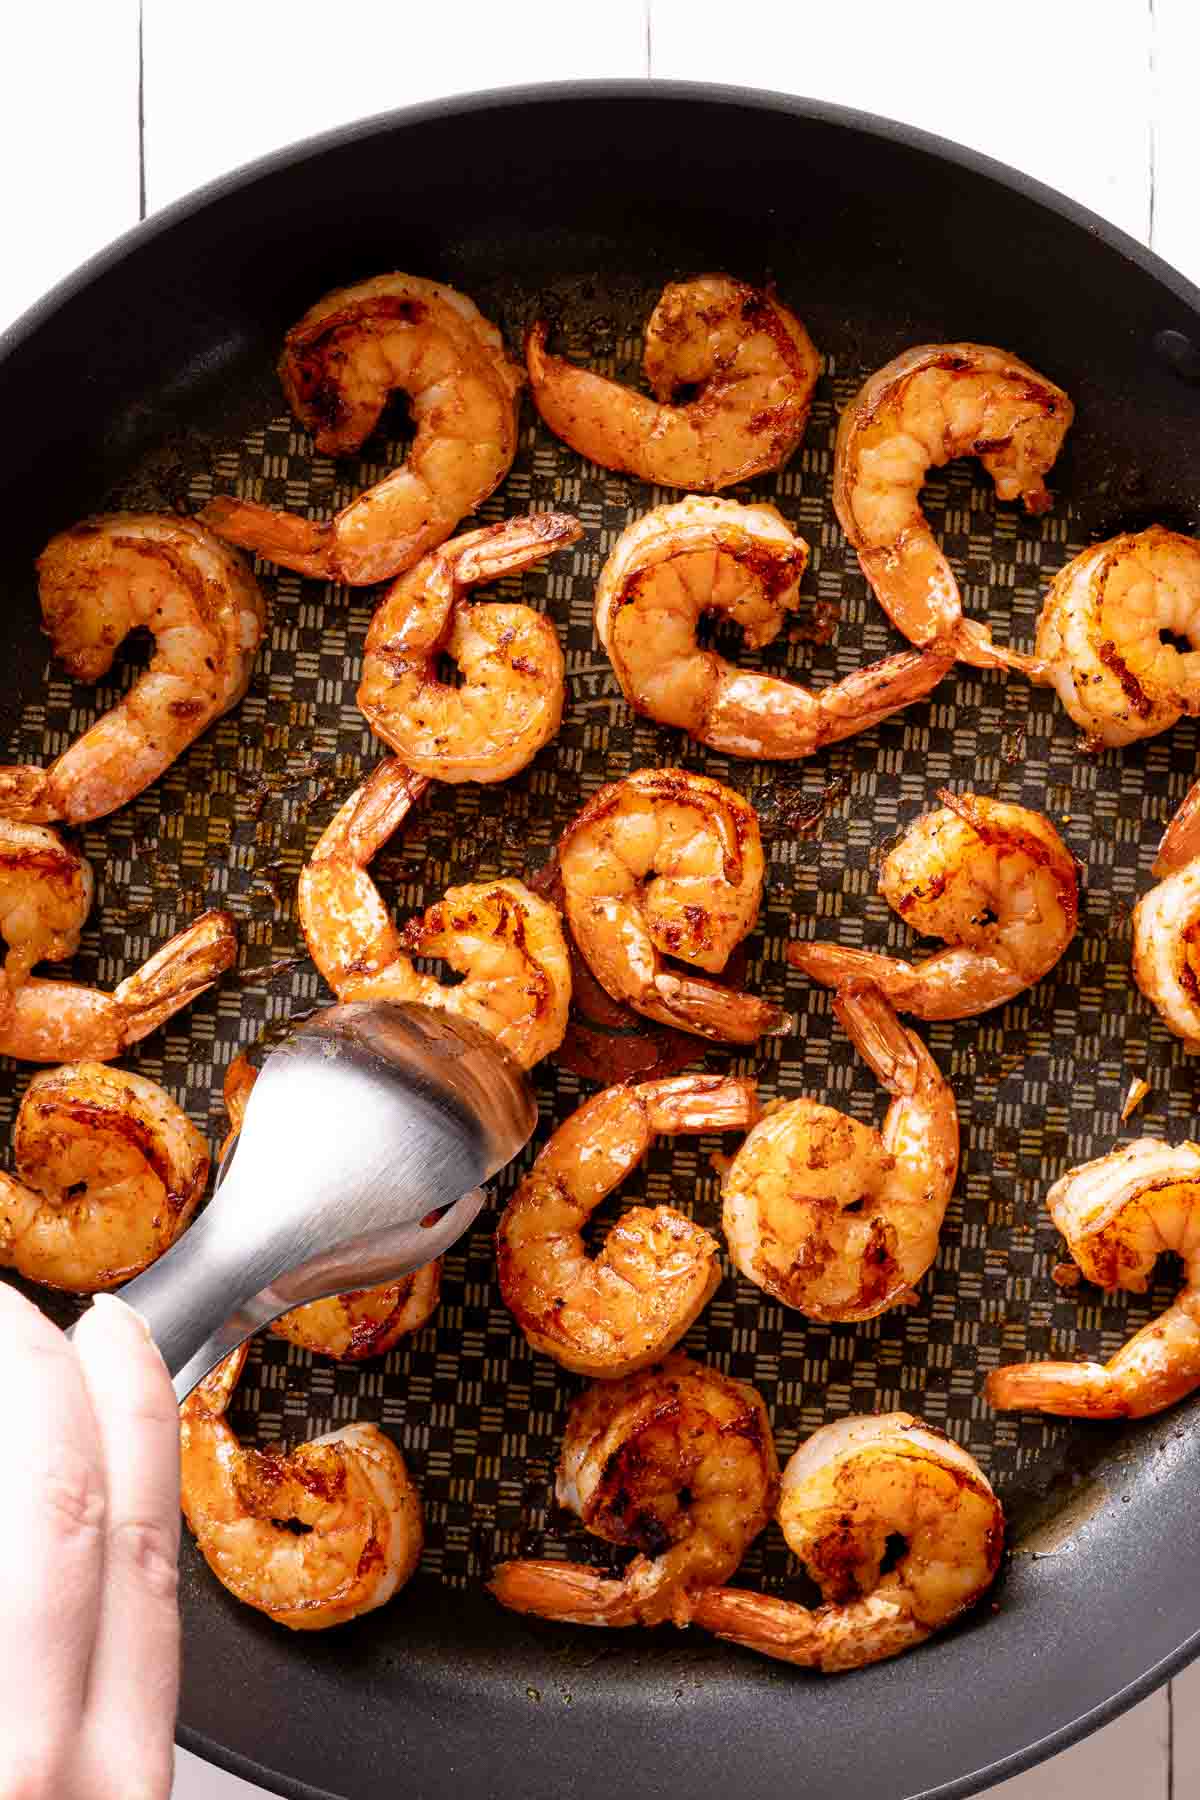
5. Keep the shrimp in the hot pan for another 2 - 3 minutes, or until the shrimp are cooked through. You can tell when the shrimp are done by looking at the side of the shrimp, it should be a pearly opaque color. And, the shrimp should be curled into a "C" shape (not a tight circle, that would be overcooked!).
As soon as the shrimp are done cooking, remove them from the pan to a serving plate. Enjoy the seared shrimp right away, just on their own or with lemon wedges (or maybe even garlic butter!).

Tips and tricks
- Don't overcrowd the pan, or the shrimp may also steam instead of getting a nice sear. If you want to cook the shrimp in one batch, you will need a large skillet (the one I'm using here is 12 inches). If you are using a smaller pan, cook the shrimp in two batches.
- A non-stick skillet works the best here. If you don't have a non-stick pan, you could use a stainless steel pan, but give it a good spray with non stick cooking spray before adding the shrimp, as extra insurance.
- A cast-iron pan won't work for this method of searing shrimp. Cast iron takes too long to heat up for this cold-start cooking method.
- For best results, use a burner that is large enough to cover the cook surface of the pan you are using. If you use a burner that is too small, the shrimp may not cook evenly.
- The cook times listed in the recipe are approximate. Cook times may vary based on the size of shrimp, the type of pan, and type and size of burner you are using. So, go by visual cues to know when the shrimp are done (the shrimp should be a pearly opaque color).
Serving suggestions
This pan seared shrimp recipe is the perfect building block for a delicious meal. It pairs so well with many different entrees and sides; here are some ideas for you to try:
- First of all, you can garnish the shrimp with a bit of chopped parsley and an extra sprinkle of red chili flakes (if you like heat!), plus some lemon wedges on the side.
- Pair the pan seared shrimp with a green salad or Caesar salad for a simple yet satisfying lunch or light dinner.
- Use the shrimp to add protein to your favorite pasta dish. Try it with my pink pasta or cream cheese pasta recipes!
- Add the shrimp to a simple rice or grain bowl to make it more filling.
- Seared shrimp would be delicious in tacos, a wrap or burrito as well!
- Or, you can use the shrimp as the main course, paired with a couple different sides. Try it with red skin mashed potatoes, microwave butternut squash, or cilantro lime roasted cauliflower!
Storage and reheating instructions
- Pan seared shrimp is best when served immediately. But, any leftovers can be stored in a covered container in the fridge for 3 - 4 days.
- You can also freeze the cooked shrimp for up to 3 months. Freeze in a zip-top freezer bag, removing as much of the air as possible before sealing.
- You can enjoy the leftover shrimp cold, straight from the fridge (this is great on salads!). Or, reheat it over low heat in a skillet, just until warmed through.
- To enjoy the leftover frozen shrimp, first thaw it in the fridge, or use the cold water thawing method. Then reheat in a pan as described above.
Recipe FAQs
This recipe pairs the shrimp with a simple seasoning blend of salt, pepper, paprika and red chili flakes (or cayenne). But, feel free to add or substitute other seasonings that you enjoy. Some good additions would be: dried thyme, chili powder, garlic powder, onion powder, or even a little sprinkling of brown sugar!
Or, you can try replacing the seasonings in the recipe with your favorite seasoning blend, such as Old Bay, Cajun, chili lime, or lemon pepper seasoning.
This recipe uses jumbo shrimp, which are typically in the range of 21 - 24 shrimps per pound.
You can use shrimp that are slightly larger or smaller than this, but, you may need to adjust the cook time up or down accordingly. The shrimp are done when the flesh turns pearly and opaque.
This recipe won't work with frozen shrimp. But, you can definitely use thawed shrimp that has been previously frozen. To thaw frozen shrimp, you can either place the shrimp in the fridge overnight, or you can use the cold water thawing method. The cold water thawing method is quite quick, so this is great if you haven't planned ahead!

Related recipes
If you’ve tried this recipe, please leave a star rating and/or review in the comments section below, I would love to hear from you! You can also follow me on Facebook, Instagram and Pinterest. And sign up for my weekly newsletter to get recipes delivered straight to you!
PrintEasy Pan Seared Shrimp
This easy pan seared shrimp recipe is ready in only 10 minutes! The cold-start cooking method, adapted from Cook's Illustrated, guarantees nicely browned shrimp that are always tender and juicy - never overcooked!
- Prep Time: 4 minutes
- Cook Time: 6 minutes
- Total Time: 10 minutes
- Yield: 4 servings 1x
- Category: main course, entree
- Method: stove top
- Cuisine: American
- Diet: Gluten Free
Ingredients
- 1 pound (454 g) jumbo shrimp, peeled and deveined (note 1)
- 1 tablespoon neutral oil (avocado oil, vegetable oil, etc.)
- ½ teaspoon paprika, smoked or regular
- ½ teaspoon kosher salt, or salt to taste (Diamond Crystal; for table salt or Morton kosher use ¼ teaspoon)
- ¼ teaspoon black pepper
- pinch red pepper flakes or cayenne pepper, to taste (optional)
Instructions
- Pat the shrimp dry very well with clean paper towels.
- Add the shrimp to a bowl, along with the oil, paprika, salt, black pepper, and red pepper flakes or cayenne pepper (optional).
- Toss the shrimp together with the oil and seasonings, until the shrimp are evenly coated.
- Place a large (~12 inches/30 cm) non-stick skillet on the stove top (with the burner off). Arrange the shrimp in the skillet so they are evenly spaced. (If there isn't enough room to arrange the shrimp without crowding, cook shrimp in 2 batches.)
- Turn the burner on to high heat. Without touching the shrimp, let them cook for 3 - 4 minutes, or until the edges of the shrimp are starting to turn opaque and the underside of the shrimp are browned.
- Turn off the burner, but keep the pan in place. Flip the shrimp to the other side. Let the shrimp stay in the hot pan for another 2 - 3 minutes, or until the shrimp are cooked through (the shrimp should be curled into a "C" shape, and the flesh will have a pearly opaque color).
- As soon as the shrimp are cooked, remove them to a plate and serve immediately.
Notes
Jumbo shrimp typically have between 21 - 24 shrimps per pound. You can use shrimp that are slightly larger or smaller than this size, but you may need to adjust the cook time up or down accordingly.
This recipe works best with a non-stick skillet. You can also use a stainless steel skillet, but spray the pan with nonstick cooking spray before adding the shrimp. Because of the cold-start cooking method, a cast-iron pan is not recommended.
For best results, use a burner that is large enough to cover the cook surface of the pan you are using. If you use a burner that is too small, the shrimp may not cook as evenly.
The cook times listed are approximate. Cook times may vary based on the size of shrimp, the type of pan, and type and size of burner you are using. So, use the visual cues to know when the shrimp are done (the shrimp should be curled into a "C" shape, and the flesh will have a pearly opaque color).
The nutrition information below is an estimate provided by an online nutrition calculator, and should not be considered a substitute for professional medical, health, or nutritional advice. The nutrition counts of your dish will vary based on the brands and exact amounts of ingredients used. See our full nutrition disclosure policy.
Nutrition
- Serving Size: ¼ recipe
- Calories: 140
- Sugar: 0.1 g
- Sodium: 293 g
- Fat: 4.8 g
- Saturated Fat: 0.5 g
- Carbohydrates: 0.3 g
- Fiber: 0.2 g
- Protein: 24.4 g
- Cholesterol: 209 mg





Mikayla
Perfect on a bed of fresh sticky rice! I think it will go quite nicely in a salad next time!
Kate
Thank you Mikayla for your comment, and yes I totally agree it would be great with sticky rice and salad 🙂
Dennis
I love shrimp and this was such an easy way to prepare them. They were delicious!
Kate
Thank you Dennis I'm so happy you liked the shrimp recipe!
Natalia
I am a plant-based eater so I don’t eat seafood but my family does. I followed the instructions and not one shrimp was left over. Great pan-seared shrimp recipe. Easy and so good!
Kate
Thank you Natalia I'm glad that your family enjoyed it 🙂
Kushigalu
Drooling over these pan-seared shrimp. Can't wait to try this for my family. Thanks for the recipe.
Kate
You're so welcome! If you try the recipe I hope you enjoy 🙂
Silvia
They were scrumptious! I added cayenne pepper as we love spicy food and served with rice on the side and tortillas. Yum! I really like the idea of turning off the pan. No more overcooked shrimp!
Kate
Thank you Silvia, I love spicy too it goes so well with shrimp!
Christy
I'm trying to increase the protein in my lunches and this pan fried shrimp is my go-to recipe now for perfectly cooked shrimp for my rice paper rolls or salad!
Kate
I'm so happy you enjoyed the shrimp Christy! These would go great in a rice paper roll!
Dee
I love making pan seared shrimp. It can go with just about anything. A quick meal when you're short on time.
Kate
Yes totally! I love how quick these are to cook 🙂
Monica
These are seriously the fastest and most delicious shrimp! I think it's the paprika that really adds that special something. Will be making these a lot!
Kate
Thank you Monica! The paprika does add a really nice color to the shrimp!
Tristin
This was such a simple way to make shrimp. Your instructions were so easy to follow and it made delicious shrimp tacos!
Kate
Thank you Tristin, these would be great in a shrimp taco (now I'm craving one!).
Sandhya Ramakrishnan
Loved making a batch to serve with rice. Thanks for all the tips and tricks! They work perfectly.
Kate
You're so welcome I'm really glad you found the tips helpful 🙂
Maria C.
Looks delicious and great for hot weather when you’re in a hurry ! Can’t wait to try this recipe myself
Kate
Thank you Maria! I love how quick this recipe is 🙂 If you try the shrimp I hope you enjoy!