


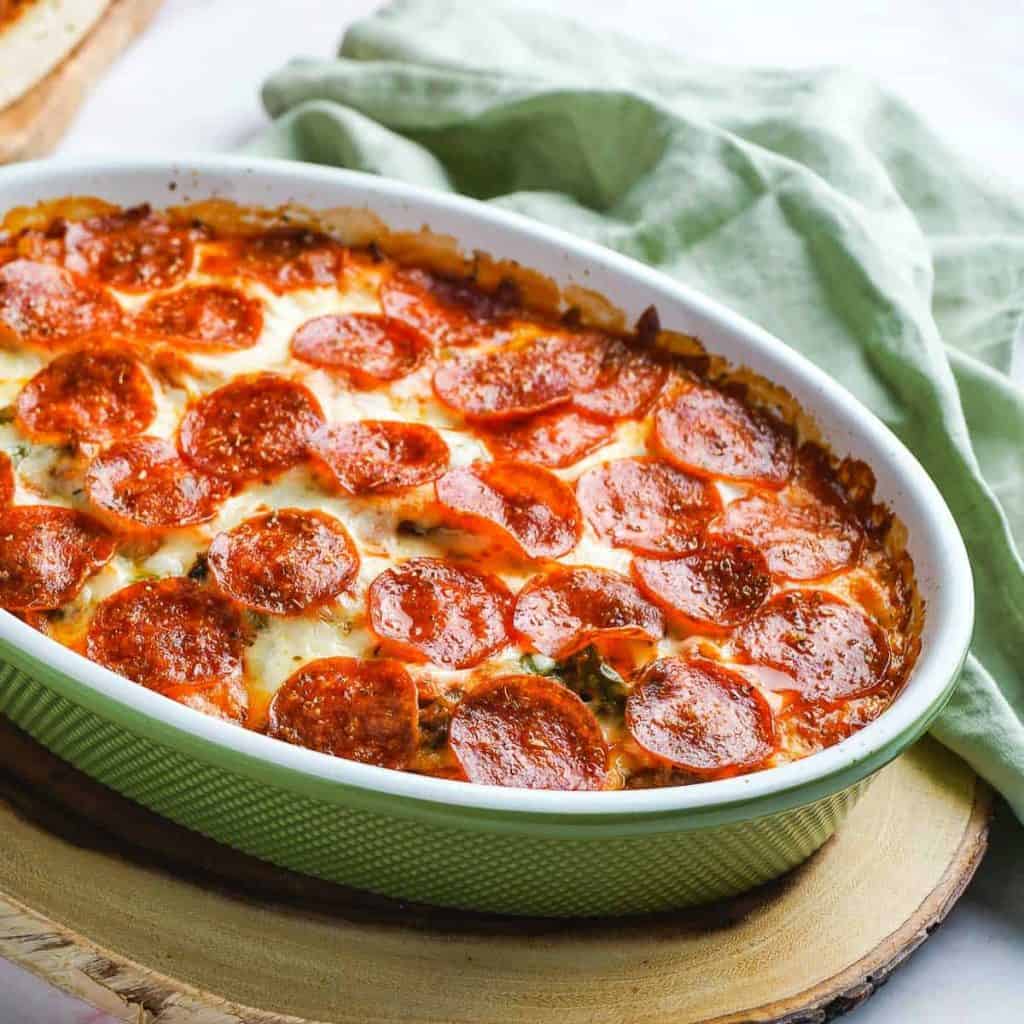
This comforting and hearty Cheesy Chili Cornbread Casserole starts with a cheesy chili base, then another layer of cheese, and then a fluffy cornbread top! Customize it to your tastes with your favorite type of cheese. And, this casserole freezes well so you can save some for a rainy day!

Note: this post was originally published in 2019, and updated in 2021 with new photos and improved instructions.
What makes a good casserole? In my opinion, casseroles should feel like a warm, cozy blanket. And to me, this casserole is basically the food equivalent of a fluffy fleece blanket (the kind with arms even!) next to a warm fire on a cold day.
This hearty Cheesy Chili Cornbread Casserole starts with a beef and bean chili at the bottom, mixed with some shredded cheese to provide a bit of extra creaminess and richness. Then, the entire surface is covered with another layer of cheese! To finish it off, a layer of cheesy cornbread is added on top, that gets perfectly browned and fluffy as it bakes in the oven. Wow that's cozy, is it not?!
What's more, you can make this entire cheesy casserole in about one hour, and it even freezes well, so you can save some for a rainy day when you need a bit of cheesy comfort food!
Recipe ingredients


Ingredient notes
- Cheese: for the cheese, I used sharp cheddar, both shredded and sliced. But, you can go with your favorite type, as long as it's a shred-able cheese that melts well (i.e. this would not be the time to use feta!). So, cheddar is good, also pepper or Monterey Jack, and Colby would all work well.
- Ground beef: to avoid having to strain excess grease from the chili, I prefer to use 90% lean ground beef. You could use a less lean beef no problem, just spoon off any excess grease after the meat is browned if need be. And, you could even substitute another type of lean ground meat like bison or turkey if you like.
- Frozen corn: the recipe calls for frozen corn for convenience, but feel free to substitute fresh corn (off the cob!). Or, canned corn would also work fine.
- Buttermilk: if you don't have buttermilk on hand, you can make a good substitute by adding vinegar to milk. I explain how to do this in more detail in the Tips and Tricks section!
Step by step photos
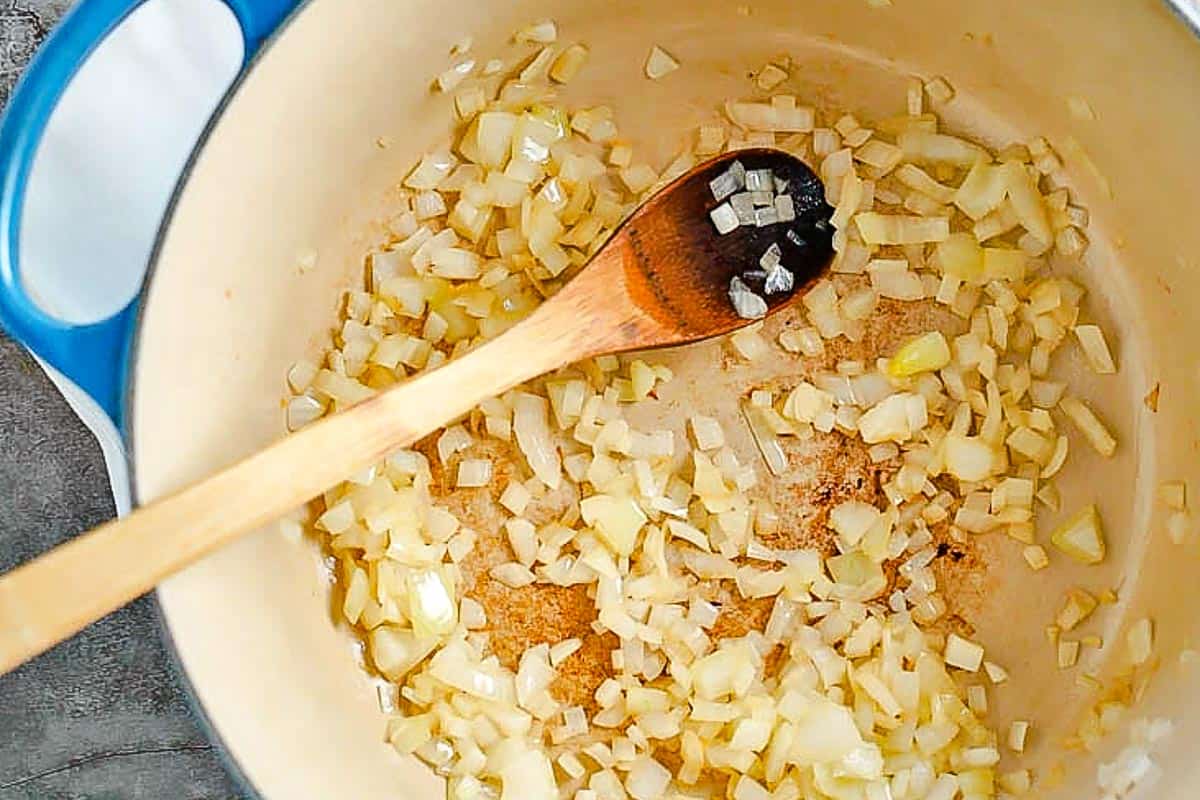
1. After pre-heating the oven, heat up the oil in a large pot over medium heat. While it's heating, chop the onion. Add it to the pan and cook until softened, about three minutes.
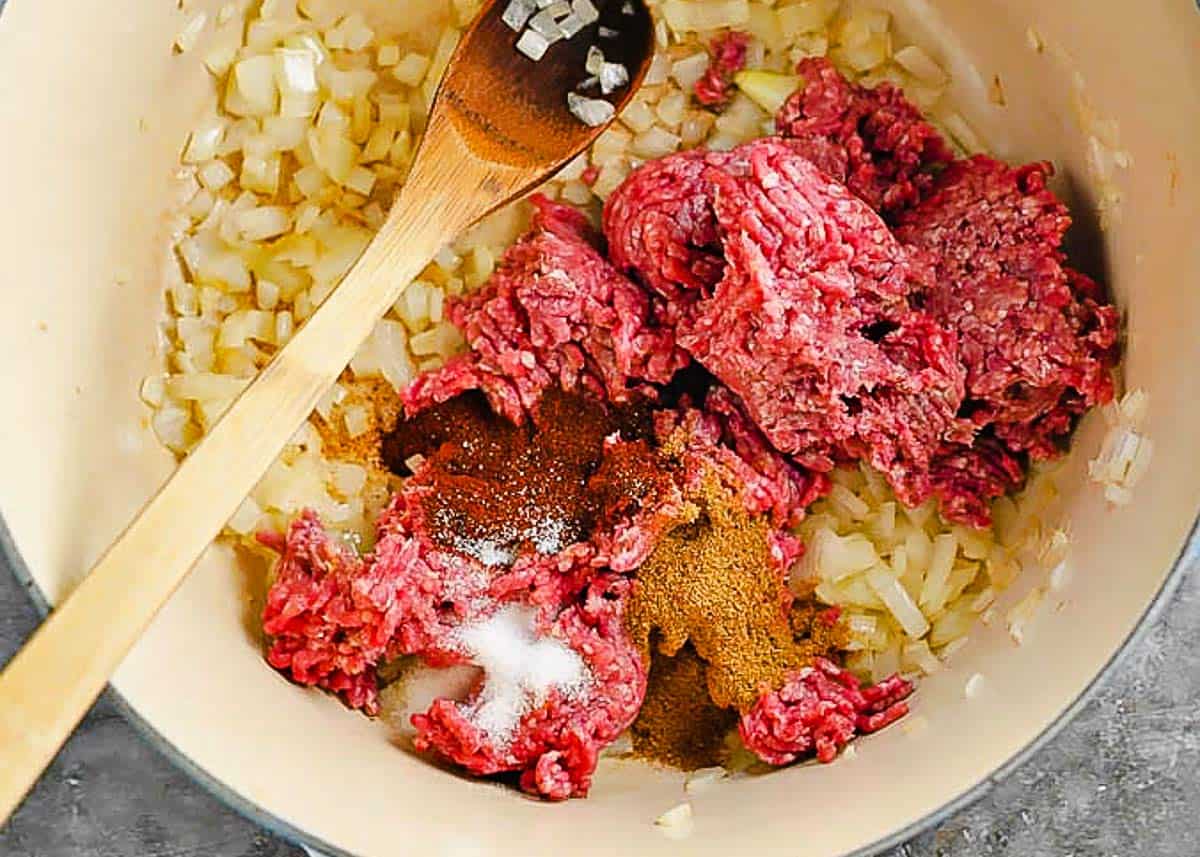
2. Then, add in the ground beef, salt, cumin and chili powder.
3. Stir and break the beef up into small pieces with a wooden spoon. Cook, stirring occasionally, until the beef is no longer pink, about five or six minutes.

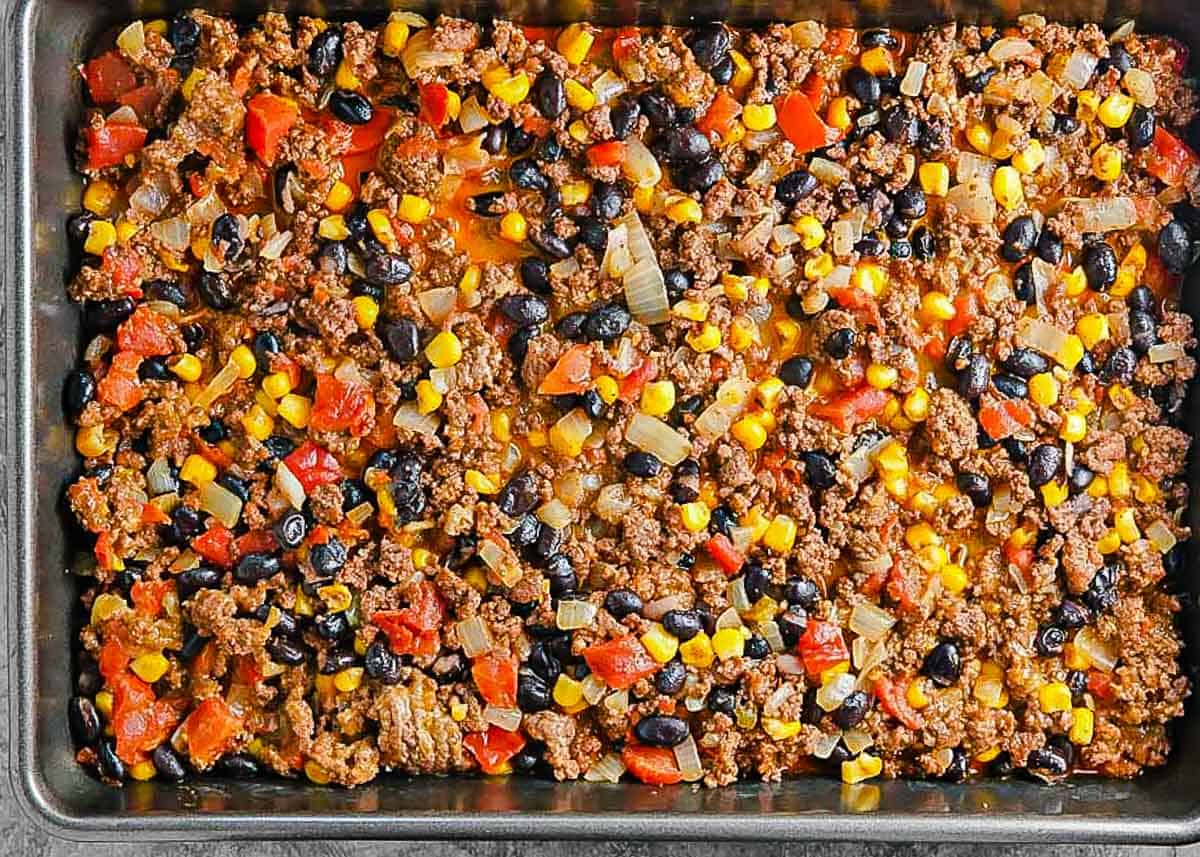
4. Once the beef is browned, add in the undrained black beans, drained tomatoes and chiles, and frozen corn. Stir and let simmer on the stove while you prep the cornbread batter.

5. Mix up the cornbread ingredients in a medium bowl, adding the cheese in last. Set aside while you work on assembling the casserole.

6. Now, turn to the chili that has been simmering. Make sure there isn't a ton of excess liquid; it should be moist but not super wet. If needed, let the chili cook for another few minutes to allow the chili to thicken. Then, turn off the heat and mix in the shredded cheese.

7. Add the chili to the bottom of a 9 x 13 inch baking pan or casserole dish.
8. Top evenly with the sliced cheese.

9. Then, spread the cornbread batter evenly across the top.

10. Bake in the preheated oven until the top is firm, browned, and a toothpick inserted in the center comes out clean.
Tips and tricks
Use Your Pockets of Time to Get Ahead!
I discussed the concept of "time pockets" in my post for 30 Minute Stovetop Chicken Enchiladas. Basically, this means that in order to speed a recipe along, I like to use any downtime in the recipe to prep the next steps.
Here, since it's ok to leave the onion and beef cooking for a few moments in between stirring, you can use that time to open up the cans, drain the tomatoes and chiles, and shred cheese if you need to.
But, I highly recommend doing these steps on the counter right next to the stove. This way, you can easily see what's going on with your onions and beef and give a quick stir when you need to.
Other tips and tricks
- I like to shred my own cheese for most recipes; that gives the smoothest result since pre-shredded cheese has additives to prevent clumping. But here, the difference between using pre-shredded and non isn't so drastic as it would be for a fondue or mac and cheese for example. So, if you want to save time, go for the pre-shredded!
- This recipe calls for buttermilk for the cornbread layer; if you don't have buttermilk, you can make a pretty good substitute! Just pour 4 teaspoons of white vinegar or lemon juice into a liquid measuring cup, and fill to the 1 ¼ cup mark with milk. Stir and let sit for 10 minutes or until thickened slightly.
Recipe FAQs
After the casserole is baked, you can store any leftovers in the fridge for 3 - 4 days, tightly covered. For best flavor and texture, however, I like to eat leftovers within 2 days.
You can even bake the casserole, let it cool for about 15 minutes, and then cover and place the entire thing in the fridge. When you're ready to serve, cover the top of the casserole with aluminum foil, then heat in a 350 degree oven for 25 - 30 minutes until heated through and bubbly. (But, to avoid thermal shock which could damage some types of glass or ceramic casserole dishes, let the casserole dish warm to around room temp first before placing in the preheated oven.)
Yes, this casserole freezes well! I like to place individual portions in food storage containers and freeze for 2 - 3 months. Then, you can easily re-heat the individual portions in the microwave or oven.
This casserole is great on its own, but there is also so much garnish potential! Try chopped cilantro, thinly-sliced jalapeño, thinly-sliced green onion, or a dollop of sour cream!

Related recipes


If you've tried this recipe, please leave a star rating and/or review in the comments section below, I would love to hear from you! You can also follow me on Facebook, Instagram and Pinterest. And sign up for my weekly newsletter to get recipes delivered straight to you!
Print📖 Recipe
Cheesy Chili Cornbread Casserole

A hearty casserole with a chili cheese layer, topped with even more cheese, and then a fluffy (and cheesy!) cornbread crust.
- Prep Time: 25 minutes
- Cook Time: 35 minutes
- Total Time: 1 hour
- Yield: 12 servings 1x
- Category: Main course
- Method: Bake
- Cuisine: American
Ingredients
For the chili layer:
- 1 tablespoon neutral oil (like vegetable oil or canola oil)
- 1 medium onion, diced
- 1 ½ pounds lean ground beef (see note 1)
- 1 teaspoon salt, or to taste
- 2 teaspoons cumin
- 4 teaspoons chili powder
- 1 can black beans, undrained
- one 10 ounce can diced tomatoes and chiles, drained
- 1 cup frozen corn
- 2 cups shredded cheese (any type; cheddar, pepper jack, and Colby are good options)
- 12 slices cheese (any type)
For the cornbread layer:
- 1 cup cornmeal
- 1 cup all-purpose flour
- 1 teaspoon salt
- 1 ½ teaspoons baking powder
- ½ teaspoon baking soda
- 1 ¼ cup buttermilk (see note 2)
- ⅓ cup neutral oil (vegetable, canola, etc.)
- 1 cup shredded cheese (any type)
Optional topping ideas:
- sliced green onion
- sliced fresh or pickled jalapeño
- sour cream
- chopped cilantro
Instructions
- Preheat the oven to 350 degrees.
- Heat 1 tablespoon oil in a large pot over medium heat. While the oil is heating up, dice the onion. Add the onion to the hot pot and cook until softened, stirring occasionally, about three minutes.
- Add the ground beef, salt, cumin and chili powder. Use a wooden spoon to break the beef into small pieces and cook until no longer pink, stirring occasionally, about five to six minutes.
- Once the beef is browned, add in the undrained black beans, frozen corn, and drained diced tomatoes and chiles. Stir to combine and let simmer while prepping the cornbread, stirring occasionally.
- Add the cornmeal, all-purpose flour, 1 teaspoon salt, baking powder and baking soda to a medium bowl. Whisk to combine. Add the buttermilk and oil, whisk until no lumps remain. Stir in the 1 cup shredded cheese. Set aside.
- Check the consistency of the chili; it should be moist but without a lot of excess liquid. If needed, let simmer for another few minutes to allow the excess liquid to evaporate. Then, taste the chili and add more seasoning if needed.
- Turn off the stovetop, then stir the 2 cups shredded cheese into the chili. Spoon the chili into a 9 x 13 inch baking pan or casserole dish. Distribute the 12 slices of cheese over the top so the entire surface is covered. Spoon the cornbread batter over the top and spread out as evenly as possible.
- Bake in the preheated oven for 30 - 35 minutes, or until the top is firm and nicely browned, and a toothpick inserted into the cornbread layer comes out clean. Serve immediately with toppings of your choice (optional).
Notes
- To avoid making your chili too greasy, I advise using lean beef (I used 90% lean, 10% fat ground beef). You can also use a higher fat ground beef and spoon off the excess grease after you brown the meat if need be.
- If you don't have buttermilk, pour 4 teaspoons of white vinegar or lemon juice into a liquid measuring cup, and fill to the 1 ¼ cup mark with milk. Stir and let sit for 10 minutes or until thickened slightly.
- After the casserole is baked, you can store it in the fridge to serve later. Once it comes out of the oven, let it cool down on the counter for 10 - 15 minutes, then cover and place in the fridge for up to 2 days. To serve, place in a 350 degree oven, covered with aluminum foil, for 25 - 30 minutes, or until heated through. (However, to avoid thermal shock which could damage some types of ceramic or glass dishes, let the casserole dish warm to around room temp first before placing in the preheated oven.)
- The casserole also freezes well for 2 - 3 months. Portion into individual serving sizes and freeze in airtight containers, then reheat in the microwave or oven until heated through.


Michelle says
Cheese is Life!! This is such a great casserole, I love all the extra toppings too. This would definitely bring me lots of joy!
Kate says
Haha! I cannot agree more with "cheese is life." So true!!
Cathy says
Looks like a perfect summer recipe to try! So yummy!
Kate says
Thank you I'm glad you like it!
Mama Maggie's Kitchen says
This Cheesy Chili Cornbread Casserole looks so deliciously good. The Cheese and the Chili are perfect combination. I wish I could eat that right this minute!
Kate says
Thank you so much I'm glad you like the recipe!
Julie says
I love your "pockets of time" concept. I'm a research scientist and I do the same thing in lab all day; every time I have a 5 minute incubation, it's all about trying to do something to make part of an experiment easier later in the day. I love that you apply it to cooking in the kitchen!
Kate says
Thanks Julie! I love hearing that you use this same concept in your work! I'm sure it can apply in a lot of different areas 🙂
Sharon says
My family would love this easy casserole dish. I love all the cheese in it and the cornbread topping.
Kate says
Thank you Sharon!
Jacqueline Debono says
I'm also a big Dutch oven fan and have a Creuset like yours but orange! It's my favourite cooking pot! This casserole sounds amazing. I've never made a cornbread casserole but I'd love to try this chili one! Definitely great comfort food!
Kate says
Yes I love my Creuset, and orange is such a great color for cookware I think, very warm and inviting! And I'm glad you like the recipe!
Marisa F. Stewart says
What can I say -- I'm totally speechless. This recipe is amazing. The cheese in it alone has my heart beating in excitement. all of the ingredients are family favorites. This would be a fantastic meal to prepare ahead and serve on those busy weeknights. Or how about on football Sunday?? YES!!
Kate says
Thank you Marisa, I'm so glad you like the recipe!
Claire says
This was so hearty and warming, I served it after we had spent the day burning off in the paddocks. It was just perfect. Thank you. I didn't change a thing!
Kate says
So glad to hear that Claire! Thank you!
Sara says
Chili and cheese are my ultimate comfort food combination. Not only is this recipe easy to make, it's SO full of flavor! I love it!
Kate says
Thank you Sara!
Carol Borchardt says
This looks so tasty and comforting! Pinned this to make for some church potlucks this fall. I think this will be a hit!
Kate says
Thanks Carol! 🙂
Amy says
This looks amazing! My husband LOVES cornbread—especially with chili + cheese! I’m going to make this for him ASAP! Thanks for the recipe!
Kate says
Thanks Amy I hope your husband likes the recipe!
lauren says
Bring on the comfort food! Perfect timing with fall just around the corner. This is a simple to make meal our whole family will eat!
Kate says
Thank you! Yes anything cheesy is definitely a crowd pleaser!
Jordan says
This is freaking genius. I love cornbread and I love chili so this is right up my alley. Can't wait to put this on the meal plan for fall dinners!
Kate says
Thank you Jordan! I look for any way to add cheese to a dish I can haha 🙂
Rose says
I have some leftover chili. I think it would be perfect for this recipe. How many cups would you suggest I use?
Rose says
I have some left over chili that I believe it would be great in your recipe. How many cups would you suggest that I use? Thanks in advance for your help.
Kate says
Hi Rose, sorry for my late reply to your comment! Using leftover chili would be a great shortcut for this recipe! I would say as long as you have enough chili to cover the bottom of the pan, about 1 inch deep, that would work! In my estimation, this would be about 6 - 7 cups chili for the 9 x 13 inch pan. If you don't have that much, you could also halve the recipe and cook it in a 9 x 9 inch pan instead! If you make the casserole I would love to hear how it turned out for you 🙂
Michelle says
I have leftover Elk chili from last night, tonight I want to make this casserole in a 10 inch skillet. How long,at what temperature does the cornbread usually need to be done?
Kate says
Hi Michelle, thank you for your question, and I apologize I wasn't able to answer you in time for you to make it yesterday. (My kids were sick so I didn't get a chance to check my comments yesterday!). I haven't tested the recipe using a skillet, but if I were to try, I would just bake it at the same temp as in the recipe, but start checking it at the 25 minute mark. (I was originally going to advise halving the cornbread recipe, but I'm not totally sure how much you would need to cover the skillet surface, so it would probably be safer to make the entire recipe, and if you have extra that won't fit, you can bake it in a separate ramekin!)
The casserole is done when the top is browned and springs back when you press it gently. And to be sure, you can insert a toothpick into the cornbread; if there is no wet batter on the toothpick then you know it's done. I hope this is helpful; if you end up making this in the skillet I hope it turns out great for you!
(And one more tip - if you're using leftover chili from the fridge, warm it up first before adding the cheese and cornbread layer, otherwise it will take longer to bake in the oven.)