
My husband is very encouraging of me working on this blog. He never complains when I make him eat the same dinner recipe I'm testing three nights in a row. So, when he mentioned last week that it had been a while since I made a dessert recipe, I knew I had to pull out all the stops for him! Coffee Oreo is his favorite ice cream, so I thought I would use those flavors to make this Mocha Oreo No Bake Dessert.
You can make this dessert ahead of time (in fact, it's kind of a requirement!) and prep is pretty easy and fast. The perfect recipe for a dinner party or potluck!
This post contains affiliate links. As an Amazon Associate I earn from qualifying purchases. If you make a purchase through the link, it won't cost you more but I may earn a small commission. I only recommend products that I personally use and love!
Mocha Oreo No Bake Dessert Ingredients

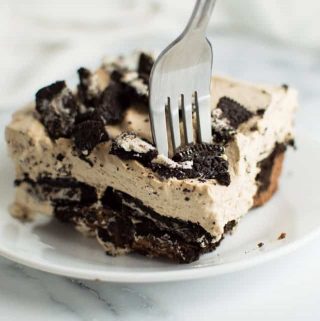
The ingredients are pretty simple (as usual): Oreos of course, cream cheese, heavy whipping cream, chocolate chips, instant coffee and powdered sugar. The magic comes in how you combine these ingredients together to get a dense, fudgy bottom layer, then a light, pillowy coffee whipped cream layer, with cakey Oreos sandwiched in between.
Mocha Oreo No Bake Dessert: A Variation on an Icebox Cake
Cakey Oreos did you say? Yes, cakey! This no bake dessert is a variation on an icebox cake, which is layers of cookies between whipped cream or some other soft dessert (mousse, pudding, etc.). The whipped cream layers soak into the cookies over several hours and turn them from crunchy to soft and cake-like.
Rather than having multiple layers of whipped cream and cookies stacked up like most icebox cakes, this one has one layer of Oreos between two different fillings, in an easy to transport 8 x 8 baking dish, making this the perfect dessert for potlucks or cookouts! And if you need to feed a bigger crowd, just double the recipe and make it in a 9 x 13 pan.

How to Make Mocha Oreo No Bake Dessert
There are a few steps to making this recipe, but overall the prep shouldn't take you more than 20 minutes total.
Oreo Crust
The first step is to finely crush some Oreos and press them into the bottom of an 8 x 8 inch baking dish. This will help the dessert release easily from the bottom of the pan when you cut it.
To crush the Oreos, I like to put them in a Ziploc bag and whack at them with a rolling pin. Easy and fun! Or you can grind them up in a food processor: less fun but perhaps more efficient. Just make sure you crush the Oreos finely and press them down firmly. This will help them stay down when you lay down the next layer.
Fudgy Mocha Layer
After that comes the dense, fudgy mocha layer. Melt the chocolate chips in the microwave and stir in the chunks of cream cheese and a tablespoon of the instant coffee. The cream cheese should be straight from the fridge, this will help cool down the chocolate so you can add in the whipped cream later without it melting!
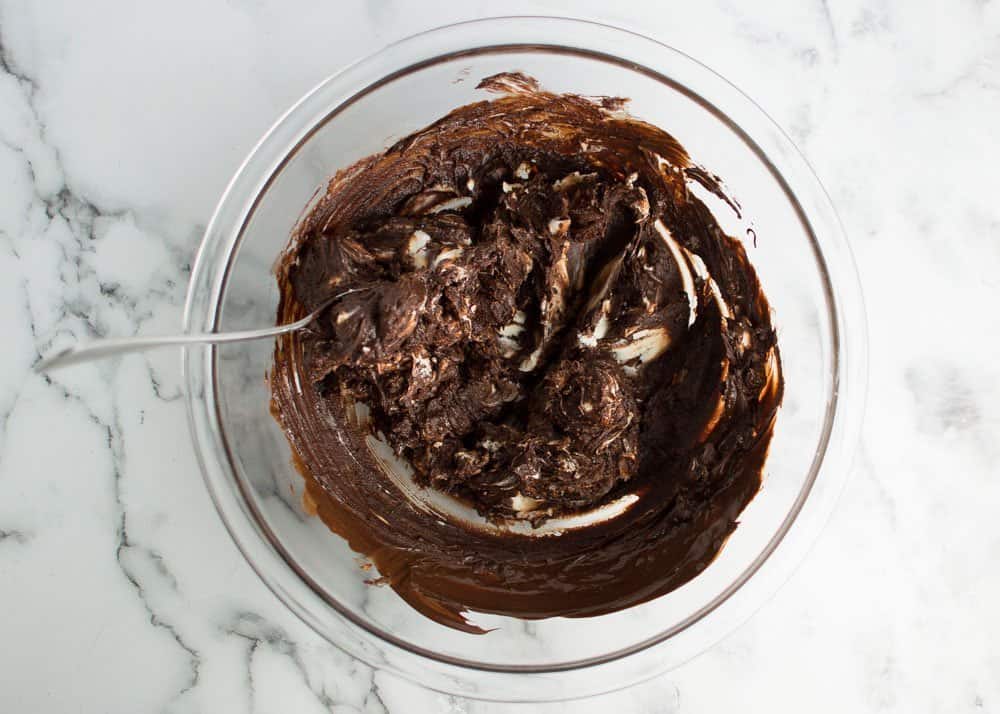
It will look like a bit of a mess at first (see above), but keep mixing and soon the cream cheese and chocolate will incorporate, and it will look like this:

Once the cream cheese and chocolate are smooth, set that bowl aside for the moment.
Coffee Whipped Cream
Time to whip up some coffee whipped cream! Place the heavy whipping cream in a large bowl (or the bowl of your stand mixer), and sprinkle over the remaining instant coffee and powdered sugar. Beat until stiff peaks form. This means the cream should hold its shape and not fall over when you pull out the beater.
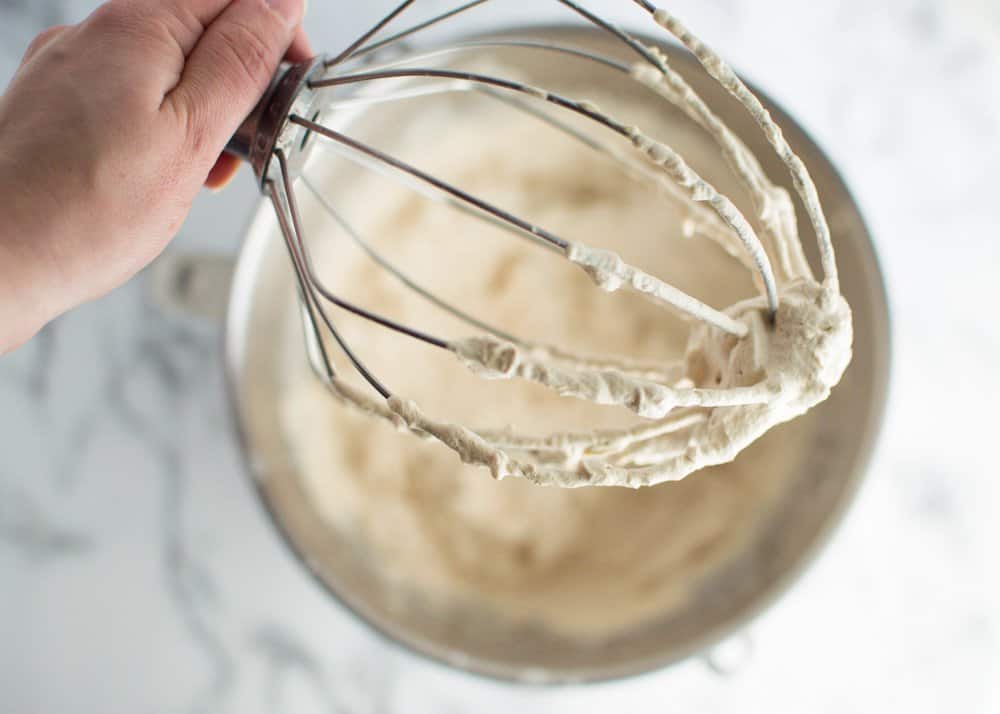
(And sorry, the stick blender whipped cream trick won't work here like in the Almond Raspberry Ricotta Parfaits recipe. There is too much cream for the stick blender to mix it evenly so you will have to use a stand or hand mixer.)
Now that you have your coffee whipped cream, add a half cup to the fudgy mocha mixture. Don't worry about folding this amount in, just stir it. This is only to start loosening up the mixture. Once you've stirred in the half cup, then add in another cup of the whipped cream, this time folding gently so you keep as much of the air in the mixture as possible.

Once you fold the whipped cream in gently, the final mocha mixture should look like this:

Then all you need to do is spread this out on top of your crushed Oreo base. Plop it all out onto the Oreo base in one blob and spread it out all the way to the edges, keeping the layer as thick as possible. This will keep the Oreo crumbs from pulling up from the bottom. If it does a little bit, no worries. Just keep spreading the mocha layer to the edges. This will help "glue" the Oreo layer down.
Oreo Layer
Next just lay out your whole Oreos on top of the mocha layer. This is the easiest step!

Coffee Whipped Cream Layer
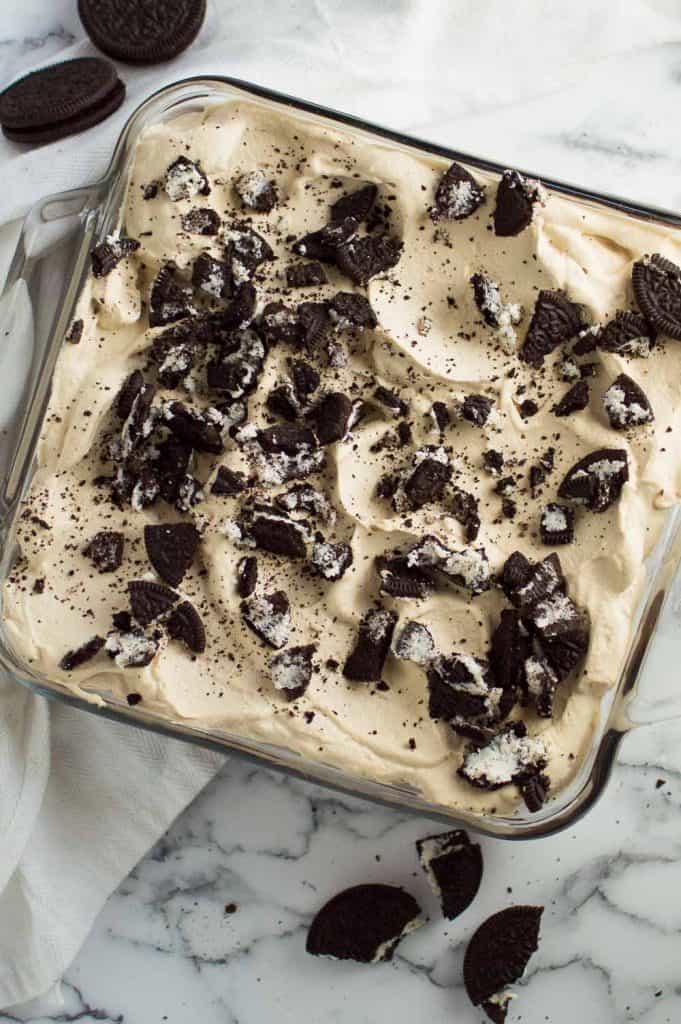
Now that you've already made your coffee whipped cream, this step is easy too. Just spread all that delicious coffee whipped cream over the Oreos and garnish with more crushed Oreos. You should have 10 Oreos left in your package if you bought the standard size; I used five to garnish the top, but you can use all ten or whatever amount you think looks good.
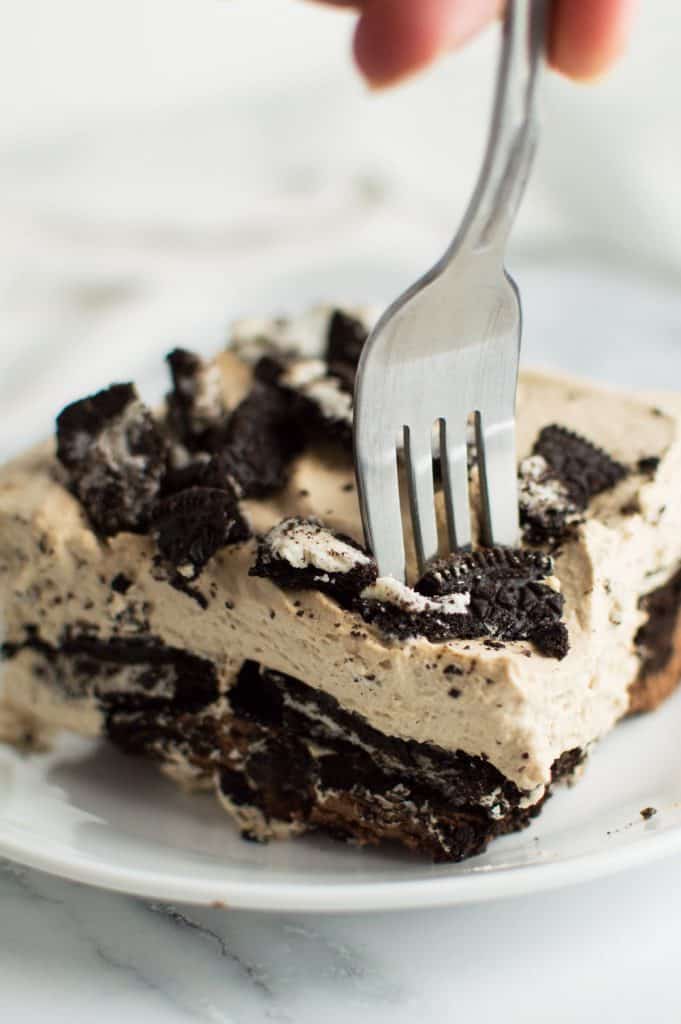
All done! Now all you have to do is wait, in about 8 hours you will have a delicious, creamy, decadent dessert to share with your friends and family!
By the way, I just bought this Anchor Hocking glass baking dish (affiliate link) you see here and I absolutely love it. It seems so much more durable than the metal baking pan I had before, and it comes with a lid so traveling with this dish is so easy. I chose this dish/lid combo over others that I saw because the lid is see-through. This is important if you are worried you are about to smush your food as you put the lid down! (If you're worried about that with this dish, just add more crushed Oreos to the top to protect the whipped cream!)

I hope this recipe brings much joy to your upcoming summer potlucks and cookouts! If you make this recipe please leave a comment below and let me know how it turned out!
📖 Recipe
Mocha Oreo No Bake Dessert
An easy no bake dessert combining the flavors of Oreo, coffee and chocolate. This decadent dessert is perfect for potlucks!
- Prep Time: 20
- Total Time: 8 hours + 20 min
- Yield: 9 servings 1x
- Category: Dessert
- Method: No Bake
- Cuisine: American
Ingredients
- 1 package Oreos (36 cookies, will use between 31 - 36 depending on how many used for garnish)
- 1 cup bittersweet chocolate chips (or your favorite type)
- 1 block cream cheese (8 oz.)
- 1 pint (2 cups) heavy whipping cream
- 3 tbsp. instant coffee, divided
- ½ c. powdered sugar
Instructions
1. Finely crush 10 Oreos, pat firmly into the bottom of an 8 x 8 inch baking dish.
2. Place the chocolate chips in a medium, microwave-safe bowl. Microwave on high for 30 seconds and stir. Microwave for another 30 seconds and stir again. If not yet fully melted, microwave for one more round of 30 seconds and stir again.
3. Cut the cream cheese into small cubes and add to the bowl of chocolate. Sprinkle 1 tbsp. of instant coffee over the top. Stir chocolate and cream cheese together until evenly combined, set aside.
4. Add the heavy cream to a large bowl or the bowl of a stand mixer. Sprinkle the remaining 2 tbsp. instant coffee and powdered sugar over the top, stir with a spoon to combine. Beat the heavy cream with a stand mixer or hand beaters until stiff peaks form.
5. Stir ½ cup of the coffee whipped cream into the cream cheese and chocolate mixture. Then add another cup of whipped cream and gently fold in until mostly combined (ok if a few streaks of cream remain).
6. Dump all of the chocolate cream cheese mixture into the center of the 8 x 8 inch pan on top of the crushed Oreos and spread out in a thick layer all the way to the edges of the pan.
7. Evenly place 16 Oreos on top of the chocolate cream cheese layer.
8. Spread the rest of the coffee whipped cream over the Oreos.
9. Using your hands, roughly crush 5 - 10 of the remaining Oreos and sprinkle over top of the whipped cream.
10. Cover loosely with plastic wrap and refrigerate for at least 8 hours or overnight. When ready to serve, let sit at room temperature for 10 minutes for easier cutting.


Dawn says
This is the ultimate dessert! It even has my favorite beverage in it - coffee 🙂 I bet the whole family will love this one, I will have to make it as a treat soon. I wish I saw this before Easter, but there is always next year for that. And of course I can make it now to practice haha!
Kate says
I'm so glad you like the recipe Dawn! Yes, coffee is my favorite beverage too, I'll take it in any form (especially dessert!). And this would be good for Easter, and also summer potlucks!
Lara Glick says
When you say instant coffee... do you just add the grounds?
Kate says
Hi Lara! Instant coffee is like little crystals that will fully dissolve in water, so not regular coffee grounds. For example, a couple brands would be Starbucks VIA instant coffee (they come in little tubes), or Folgers Classic Roast Instant Coffee Crystals. You can find instant coffee next to the regular coffee in the grocery store, but it usually comes in a jar or tall container. I hope this helps, and if you make the dessert I hope you enjoy it! 🙂
Jill says
This would be so dangerous for me to make - I would eat way too much of it! But I think I've gotta try it anyway 😉
Kate says
Haha yes that is exactly what happened to me!
Natalie says
Oh wow that looks soooo delicious. This will fit perfectly as a dessert after Sunday dinner. I have some friends coming over so this will be surprise for all. Can't wait to try this beauty.
Kate says
Thanks Natalie I hope you enjoy it!
Beth Pierce says
This was delicious and looked like something straight out of the bakery window! My whole family enjoyed this for dessert last night!
Kate says
Wonderful I'm so glad! Thanks Beth!
Jen says
Thats awesome your hubs is so supportive. And cute you reward him with desserts. This one looks amazing. Pinned for July 4th!
Kate says
Haha yes he is supportive I'm very lucky!
Justine Howell says
Best!! Love easy no bake desserts.
Kate says
Yes me too!
Alina | Cooking Journey Blog says
I love no bake desserts, and those coffee flavored like yours are just perfect treats for a weekend brunch.
Kate says
Yes I agree, I love coffee in any form (especially dessert!).
Jena says
Hi there!
I was wondering if you can mix some melted butter with the Oreo crumbs to make a stronger crust to hold. Thought I’d ask in case you may have tried it and it was too rich.
Thanks!
Kate says
Hi Jena! Yes you definitely can! And I've actually got comments from some other people who have tried doing that and said it worked out really well for them! When testing the recipe, I went back and forth on whether I should include the melted butter in the crust, and decided not to in the end just because it saved a step, and the crushed Oreos in the bottom are really just there to help the dessert not stick to the pan.
But, you definitely can add the butter if you want more of an actual crust on the bottom. You would only need a little bit, just enough for it to just hold together so it's not too wet, probably 1-2 tablespoons would be a good starting place. If you end up making the recipe with the butter please let me know how you like it!
Tina says
Could you use espresso powder instead of instant coffee?
Kate says
Hi Tina, I think you can definitely use espresso powder. The key is that it needs to be able to dissolve quickly, so as long as it's marked "instant" (or gives directions where all you need to do is stir into hot water) it should work! The flavor will probably be a little stronger than instant coffee, so if you want, you could always add a little bit less than the recipe calls for and give it a taste to see if you need to add more. If you end up making the recipe with espresso powder I would love to know how you like it!
Jamie says
Can you use normal coffee grounds? Not a coffee drinker so have no clue the difference
Kate says
Hi Jamie! I'm sorry but normal coffee grounds won't work in this recipe, you need something labeled "instant." Instant coffee dissolves completely in the moisture of the filling, but regular coffee grounds won't, and will just give the mocha filling a grainy texture. Even though you're not a coffee drinker I hope you like the recipe if you end up trying it!
Maya says
Hi! I made this recipe for my family and loved it! The instructions were super easy to follow and quick to complete. I love that it doesn't require baking, it's perfect for the summer heat. Thanks for the recipe!
Kate says
Hi Maya! I'm so happy your family loved the recipe - that means so much to me because this is one of my family's favorite recipes too. And yes, not having to turn on the oven during the summer is a nice bonus! 🙂
Rii says
Is there any substitute for heavy cream? Its very hard to find those here in our country
Kate says
Hi Rii, thank you for your question! I haven't tried making this recipe with any substitutions for the heavy cream, but I did some research and found this article on heavy cream substitutes. You will need to use one that says it will whip up. I haven't actually tried any of these myself, so I can't guarantee what the results will be. If you end up trying one of these, can you let me know how it worked out? https://www.myfrugalhome.com/heavy-cream-substitute/
Link says
Cream works, thanks 🙂
Kate says
Glad you like the recipe Link! 🙂
David Betts says
I made this for recently for family and man is it good. About to make a double batch for Easter.
Kate says
Thank you David, I am delighted that you and your family enjoyed the recipe! Happy Easter!
Bonnie says
Hi! If I wanted to make this in a 13x9 pan, do I just double all the ingredients?
Thank you!
Kate says
Hi Bonnie! Yes you can double the recipe and it will work well in a 9 x 13 inch pan. I have heard from other readers that they found it easier to spread the mocha layer over the Oreo crumbles when the Oreo crumbles have been mixed with a couple tablespoons of melted butter first to moisten them, so since you will have to spread the mocha layer over an even larger area you may want to try this. If you end up making the recipe please let me know how you liked it!
Carrie says
So if you double and put in a 13x9 pan. Do you still only add 1/2 cup of the coffee whip cream and 1 cup of whip cream to the cream cheese or do you have to double what you add
Carrie
Kate says
Hi Carrie, thank you for your question! If you are doubling the recipe, you would also double those amounts for making the cream cheese layer. So you would add 1 cup of the whipped cream, then an additional 2 cups. You just need to make sure there is enough of the whipped cream left over after that to spread across the top of the 9 x 13 pan. I hope that helps, if you make the dessert please let me know how you liked it! 🙂
Carrie says
So if I put in a 9x13 and double the recipe do I still put 1/2 cup coffee whip cream and a cup of whip cream to the cream cheese
Thanks
Agatha says
Hi can the recipe be in the fridge for just 3hours, what that be ok?
Kate says
Hi Agatha thank you for your question! Yes you can definitely keep it in the fridge for only 3 hours, it will still taste delicious. The Oreos just may not be quite as soft. So if that's fine with you, go for it! I hope you enjoy the recipe 🙂
Linda S Miller says
Would it be okay just to use cool whip if I don't have the heavy whipping cream? Can't wait to try this it sounds so delicious😋❣️❣️
Kate says
Yes definitely! The recipe calls for 2 cups of heavy whipping cream (that's measured before whipping), so you will need about 4 cups of cool whip. If you end up making the dessert I hope you enjoy it!
Ella Scarchilli says
Thoughts on using instant espresso?
Kate says
Hi Ella! Yes you can use instant espresso, I have actually used that before. It may have a stronger coffee flavor than using instant coffee. Just as long as it's "instant" (meaning it will dissolve completely in water), it should work well. If you make the recipe please let me know how it goes!
Sherry says
How many days does this keep? Can you freeze this? Looking forward to making this!
Kate says
Hi Sherry! This will keep for max 3 - 4 days in the fridge tightly covered. But, in my opinion it will be best for 1 - 2 days after making. I have never tried to freeze this so I can't say for sure about that I'm sorry! In my research it looks like whipped cream does actually freeze well, so if you have leftovers it may be worth a try. I really appreciate your questions because I have been meaning to update this recipe with more info on storage, etc. so this is motivating me! If you try the recipe I hope you enjoy 🙂
Jessica says
I just made this and my only issue was my chocolate and cream cheese mixture got clumpy. So when I mixed the whipped cream into it, there were chocolate chunks that wouldn't cream smoothly. I did end up having to try to whip it with a hand mixer. It did end up being lighter, but there were little chunks of chocolate in it.
Kate says
Hi Jessica thank you for trying my recipe and for taking the time to leave a comment! I think it's possible that your chocolate got a little too hot when it was microwaved, which can cause the texture to become lumpy. That being said, this is one of my older recipes so I think it could use an update - when I update it I will re-test the recipe and try to make the directions more clear about what to look for when heating the chocolate to avoid overheating. So I appreciate your feedback on the recipe, it will help me improve! Even though the cream cheese layer wasn't perfect, I hope you enjoyed the recipe.